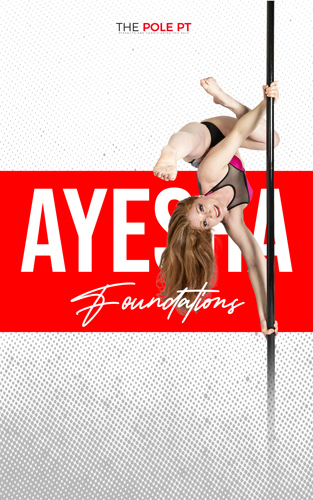
When I announced I was writing a blog about the anatomy of the Ayesha, I received soooo many awesome questions. It’s not surprising this move is so puzzling. The Ayesha is both a pole-goal must-have and (to use the technical term) such a ‘dang tricky’ trick to master!
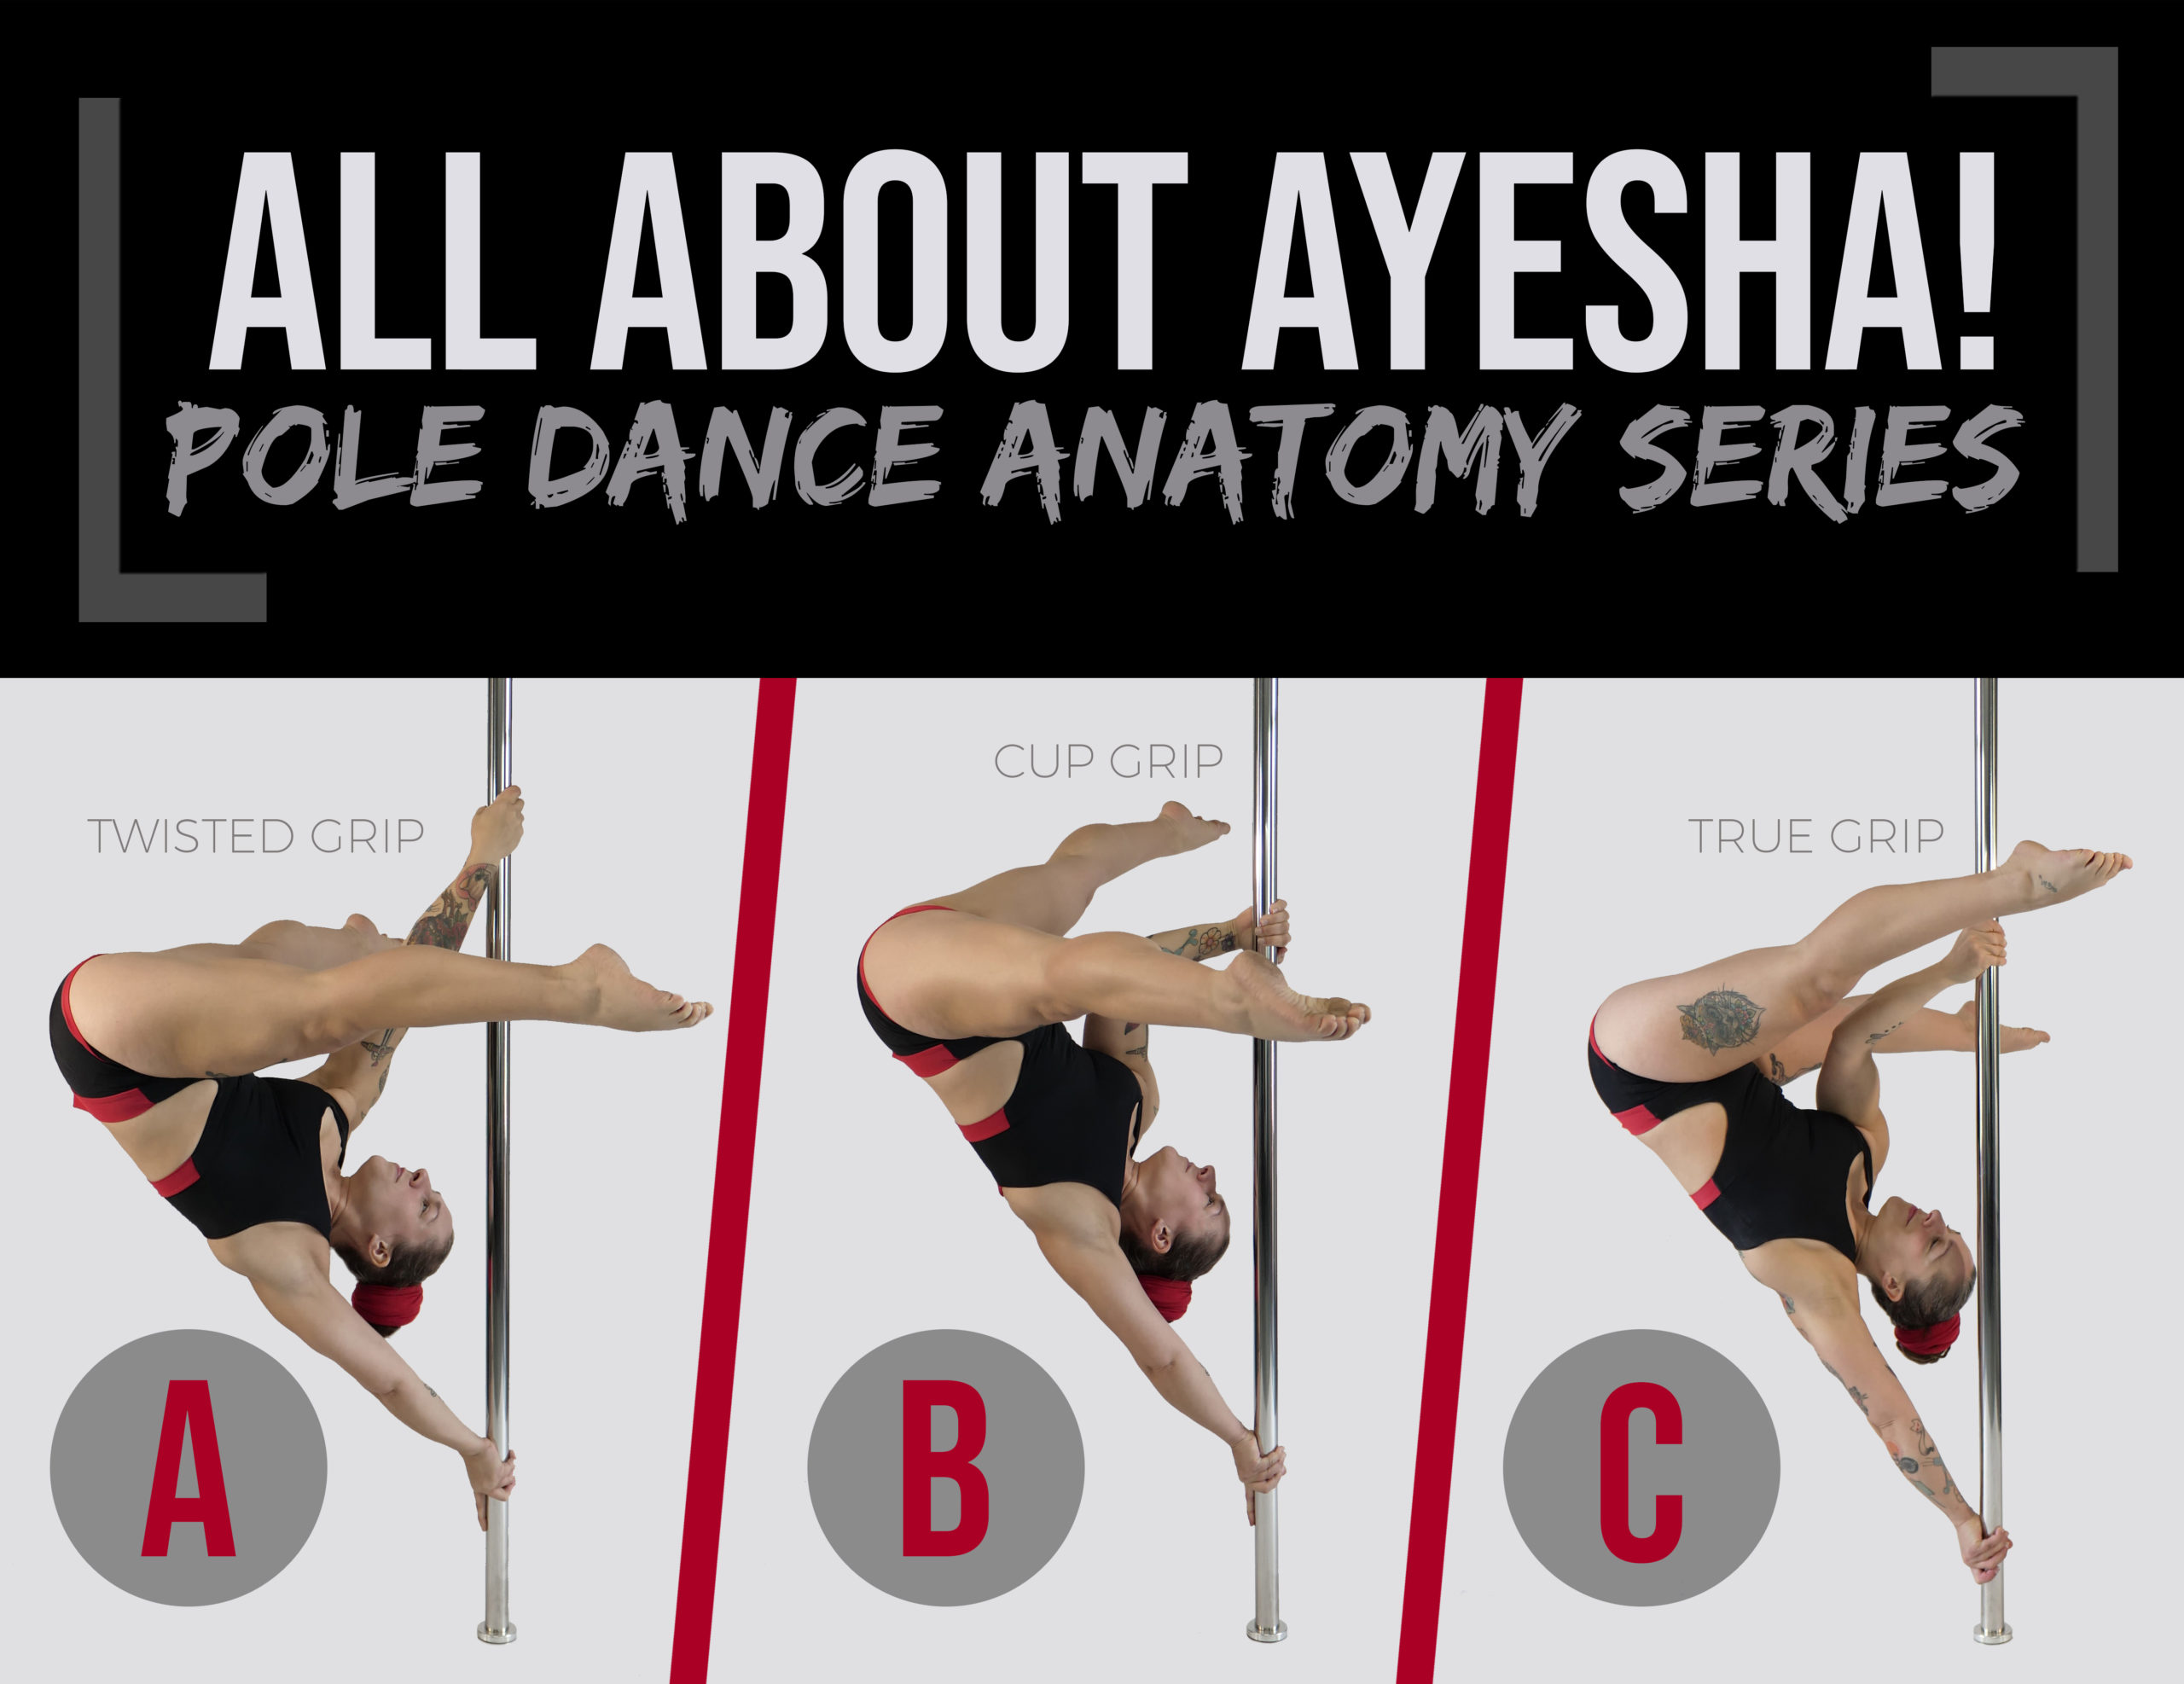
Queries from pole dancers about this move spanned all conceivable entry points (handsprings, phoenix, muscle ups, entering from an invert etc, etc), all varieties of grip (twisted, cup, true, elbow… did I miss any?), and ranged from tips for finding the perfect balance point to progression exercises.
Honestly, each question deserves a blog post of its own! I don’t want to skim over any of the gold, so I’m breaking this down like a four finger Kit Kat.
Today, we’ll look at the most common issue I see with my clients when they are struggling to ‘stick’ their Ayesha. If you or your students are feeling frustrated about not being able to land that balance point in your Ayesha – read on! ????
The Anatomy of the Ayesha
There is a LOT going on with this move – isn’t there always?!
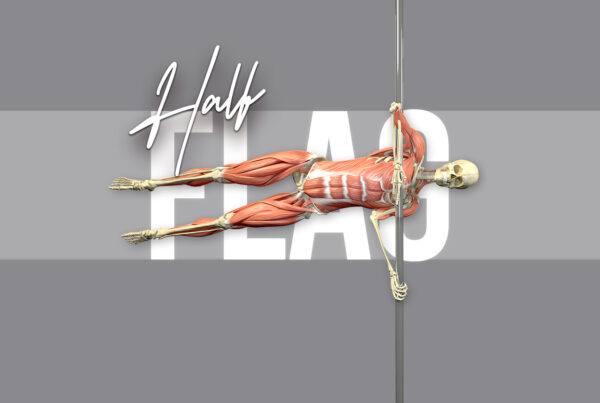
We need excellent shoulder stability ✔ pushing strength ✔ and good overhead movement mechanics ✔ for that bottom arm. We need good pulling strength ✔ for the top arm. We need ninja isometric core strength ✔ to hold our hips and spinal position, plus quad and hip flexor strength ✔ to hold our legs straight for dem ‘lines’. Oh, and did I mention the MANY wrist alignment considerations?
All these factors need to be considered when learning and progressing towards the Ayesha. That said, when it comes to that common ‘I just can’t find the balance point’ struggle, I see the same thing coming up over and over again.
Overhead mobility is always my first port of call when someone tells me of their Ayesha woes – and 9 times out of 10, it is the missing link needed to make this ‘click’.
Ayesha anatomy – the #1 reason you can’t balance your Ayesha
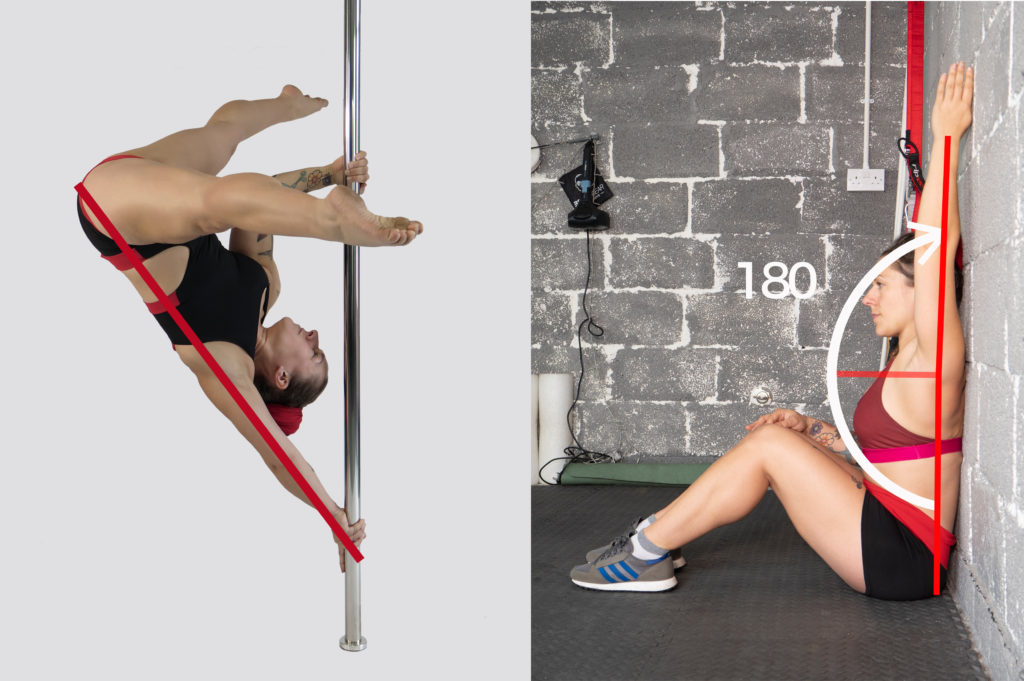
When we perform the Ayesha, our bottom arm needs to be fully overhead at 180 degrees in order to stack our wrists, shoulders and hips in line. It’s irrelevant whether you are doing your Ayesha in cup, twisted or true grip – the bottom arm positioning remains the same.
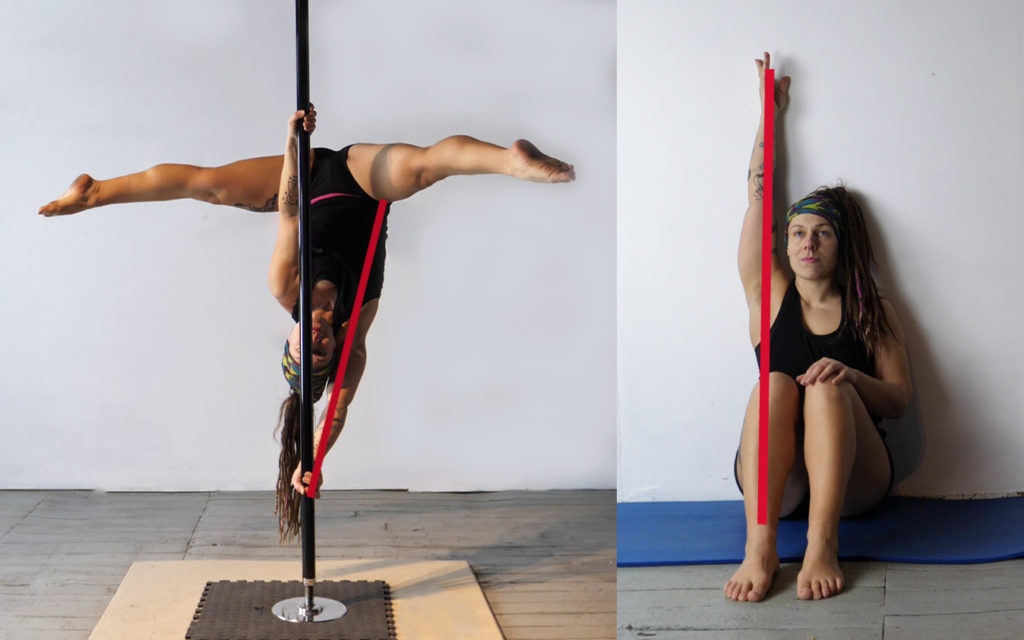
This line from our wrist, to our shoulders, to our hips is the crucial ‘stacking’ that is required to balance the position.
To check this, you can take the test below (this video is taken from my Ayesha Foundations programme, which is why I’m chatting about the “app” in the video, but ignore that part and check out the demo!).
If you cannot reach the wall in the seated position shown above, with knees tucked, back flat against the wall and the hand directly above your shoulder, then you will not be able to create this line in your Ayesha, either. In my experience, this is the number 1 reason people struggle to find the correct balance point.
What happens to your Ayesha if you don’t have 180 degrees of overhead shoulder mobility?
Without 180 degrees of shoulder flexion, you’ll find it much harder to conquer this trick – and even if you DO manage to overcome that instability, your Ayesha may always look a little ‘off’ from certain angles.
Your body will compensate in other ways in an attempt to find balance and, usually, one of two things will happen (or both!):
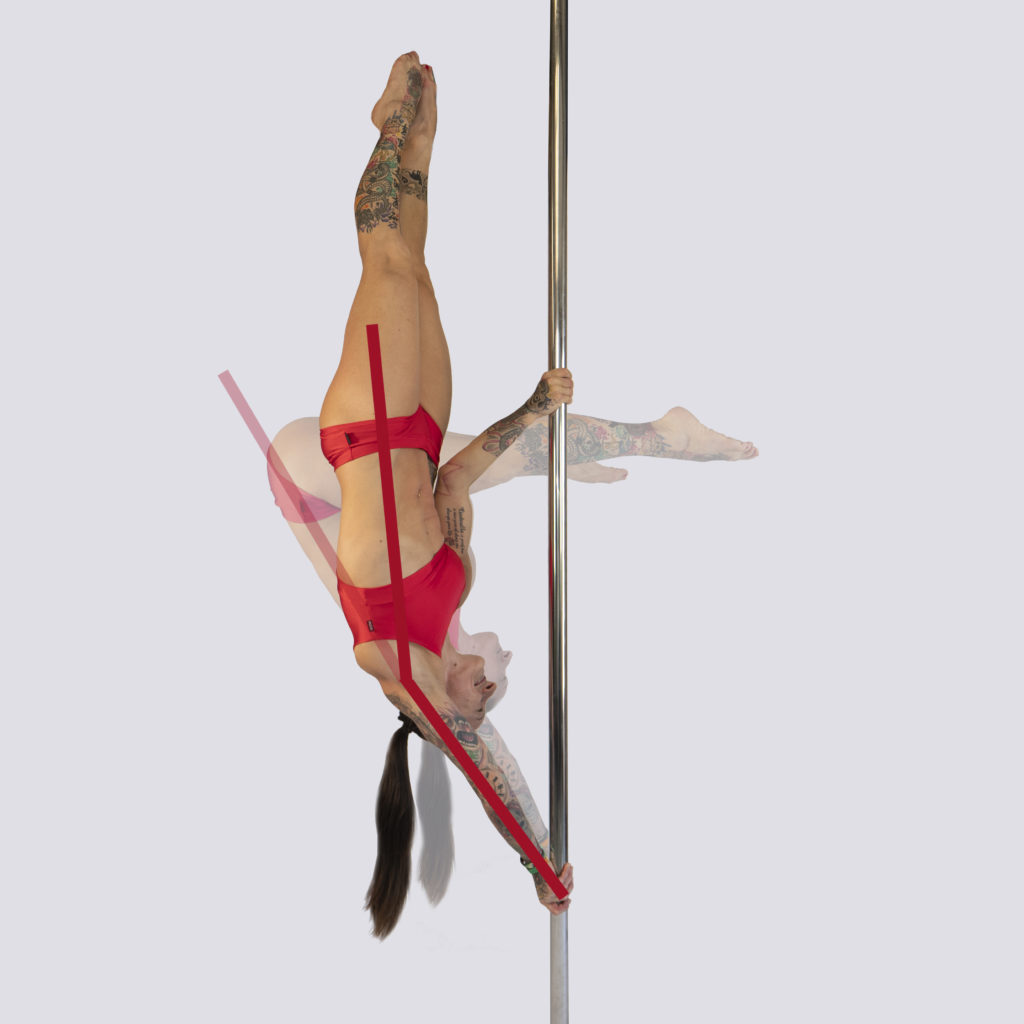
- Your body will try to move out of the ‘nose in line with pole’ alignment and shift your bodyweight to the side. This is your body trying to put your bottom shoulder back into a position where it feels more comfortable. The problem is, your weight will then be off balance and you’ll find it extremely difficult to take your foot (the same side foot as the top hand) off the pole – because that’s the only thing stopping you from twisting even more!
Here’s what that ‘twisting’ looks like in an inverted D position (I’ve shown this from two different angles below so you can see it clearly)…
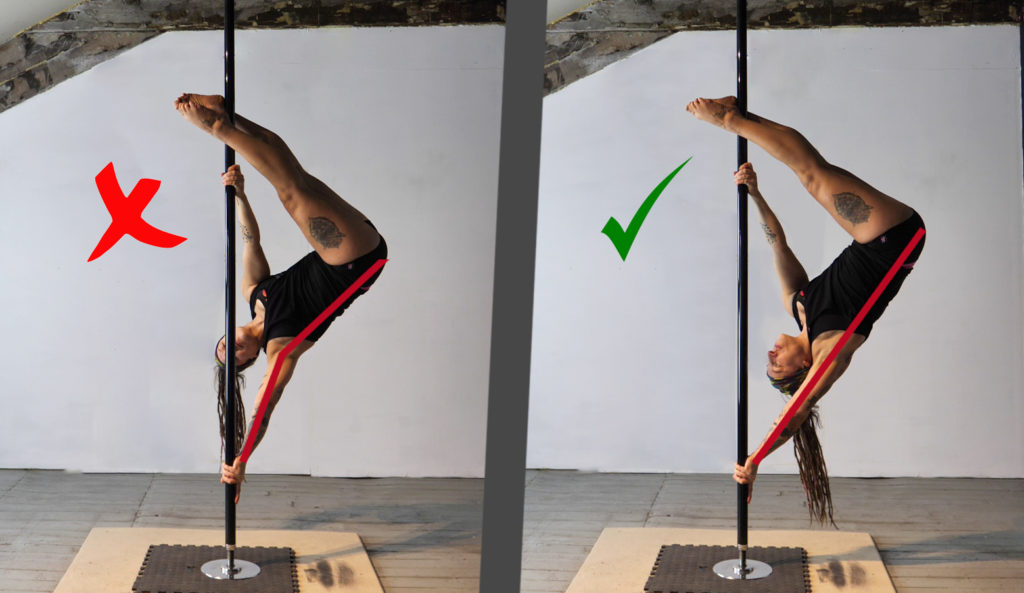
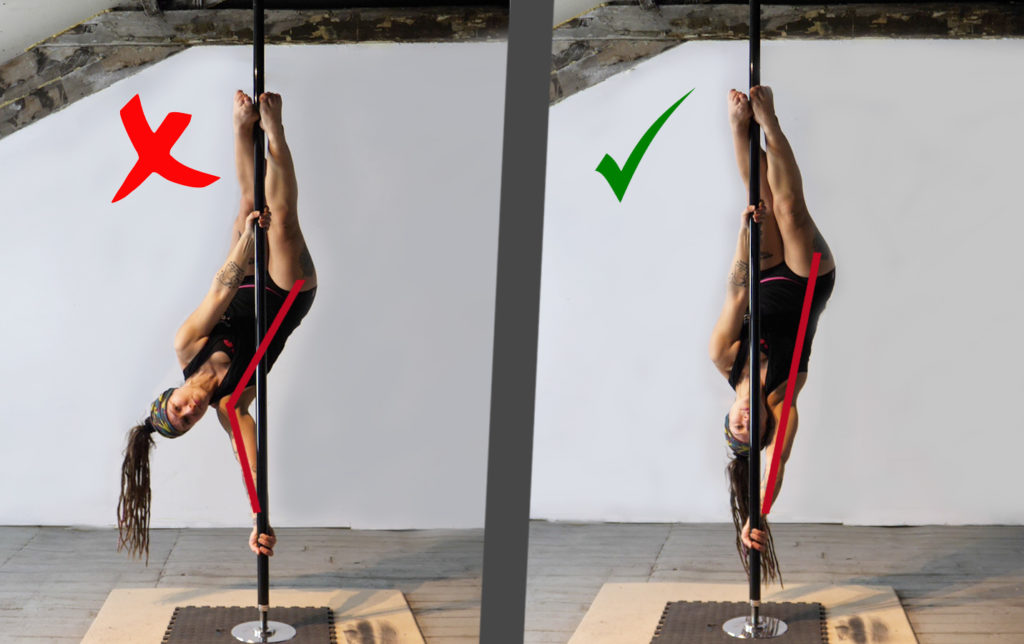
If you can happily hold your inverted D for dayz but can’t find the balance to take your feet off for your Ayesha, it could be because you haven’t got this whole ‘stacking’ thing nailed just yet – is it your shoulder mobility that is letting you down?
- You won’t be able to shift your hips back to create the optimal stacking ‘line’. This is another way of your body saying ‘nope’ to the shoulder stacking. By keeping your hips closer to the pole, your shoulder won’t have to go fully overhead. Here’s what that looks like…
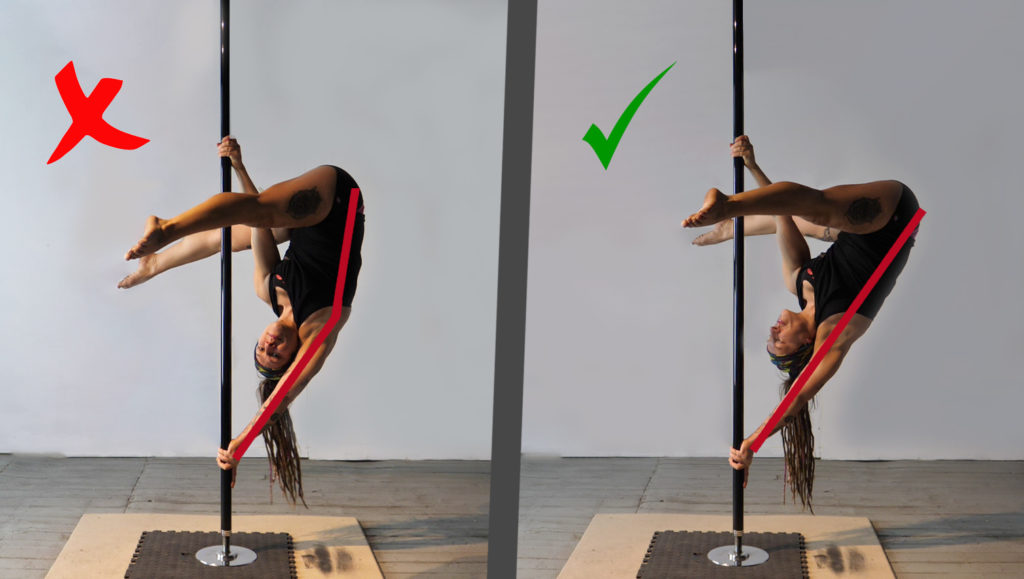
This is the same reason you might be able to hold a pencil position easily (shown below), but lose balance when you try to drop your hips back into the Ayesha.
As you can see from the image above, the pencil position does not require the full 180 degrees of overhead mobility. It is only when we drop our hips back into our Ayesha and try to create the pretty ‘triangle’ that the requirement for 180 degrees of shoulder flexion comes into play.
How to improve overhead mobility for the Ayesha
If you want really specific exercises to improve your overhead mobility, please see an experienced strength coach or physiotherapist in person – they should be able to do a hands-on assessment and help you pinpoint what is restricting your overhead movement. It isn’t universal. Scapula mechanics are important here, too, so just because you can get your hand overhead, doesn’t mean your shoulder is stable there. If in doubt, get an in-person assessment!
Subject to that, my approach to improving overhead mobility is usually through a combination of soft tissue release through foam rolling/self-massage and stretching, combined with end-range strength work.
The usual suspects that can restrict our overhead movement are tight pecs and lats. Regular foam rolling and stretching these muscles can help to release some of this tightness.
But this alone is never enough! You will need to work on strengthening at the end range of your shoulder flexion to see lasting improvements in your overhead shoulder mobility. One of my favourite exercises for doing that is shown below.
Aiming for 5 sets of 5 second holds at your end point on each side, a few times a week, is a good start, progressing from the bench to the floor when it gets easy!
I usually programme foam rolling after a warm up followed by end range strengthening exercises like the one above. Remember, this is just the beginning! Once you are able to hold your arm in the 180 degree position, you will need to build strength in that position before taking it upside down into your Ayesha! 🙂
Got your overhead mobility nailed? Then stay tuned, friend! In my next post I want to talk about another common limiting factor with the Ayesha that could be holding back your progress. If you asked me an Ayesha question and I didn’t answer it yet – I’m getting to it! 🙂
Want a little more guidance and structure for your Ayesha training?
Download and start my 6-week Ayesha Foundations program today!
All the strength conditioning and skill progressions to help you safely and confidently nail that Ayesha!
Ayesha – we’re coming for ya!
If you’d like to geek out more with me on the anatomy of pole dance, or you want more details on how to programme these exercises, check out my books – Strength and Conditioning for Pole – and Pole Anatomy – both available now in hard copy or downloadable ebook!




I used to have a strong ayesha then I injured my wrists (suspected RSI) and had to rebuild strength in all hand only moves. My elbow Ayesha is very strong but my true grip my top hand feels like it’s slipping off all the time? Why could this be?
P.s I have your book and love it!
Hi Hannah, thanks for commenting and for buying the book! 🙂 The top hand in true grip requires a good range of supination of the wrist/forearm. I’m wondering, if you have previous wrist issues, maybe it is this supination that is causing the problem. Check out the section in the book about Wrist Supination/Pronation and you’ll see some mobility tests – try those and see if your range of motion there is limited. That might give you some clues. If your range of motion there looks good, you could try adding some of the exercises in that chapter to help strengthen that supinated position. ???? Please feel free to ask if you have any questions at all!
I love this book so much! Is there somewhere a PDF of only the tests with space for recording data? I’m making this for myself now, seems useful. Thank you again for this book.
Hi Eva, thank you so much! I don’t have that unfortunately – it’s a great idea, though! 🙂 There is a blank table in the book for recording the test results, if that helps (it’s at the start of Part 2)?!