On the day of writing this blog post, my second book Pole Anatomy has just been released! Yay!
Now that hunk of a project is finished, I’m back in the room!
Sorry I left you all hanging there.
Hello! How have you been? What did I miss?
Having spent the last 12 months (and some!) wandering wide-eyed and slightly delirious around the body-nerd rabbit hole, I’ve reappeared with some thoughts.

Yup, I’m feeling fresh and inspired to explore all things pole anatomy and strength and conditioning with you again. Yay! Lemme at it.
My plan is to spend more time here on the blog diving into individual pole moves – and what better place to start than with the very first move in the book – the coolest of all the cool kids: Cupid!
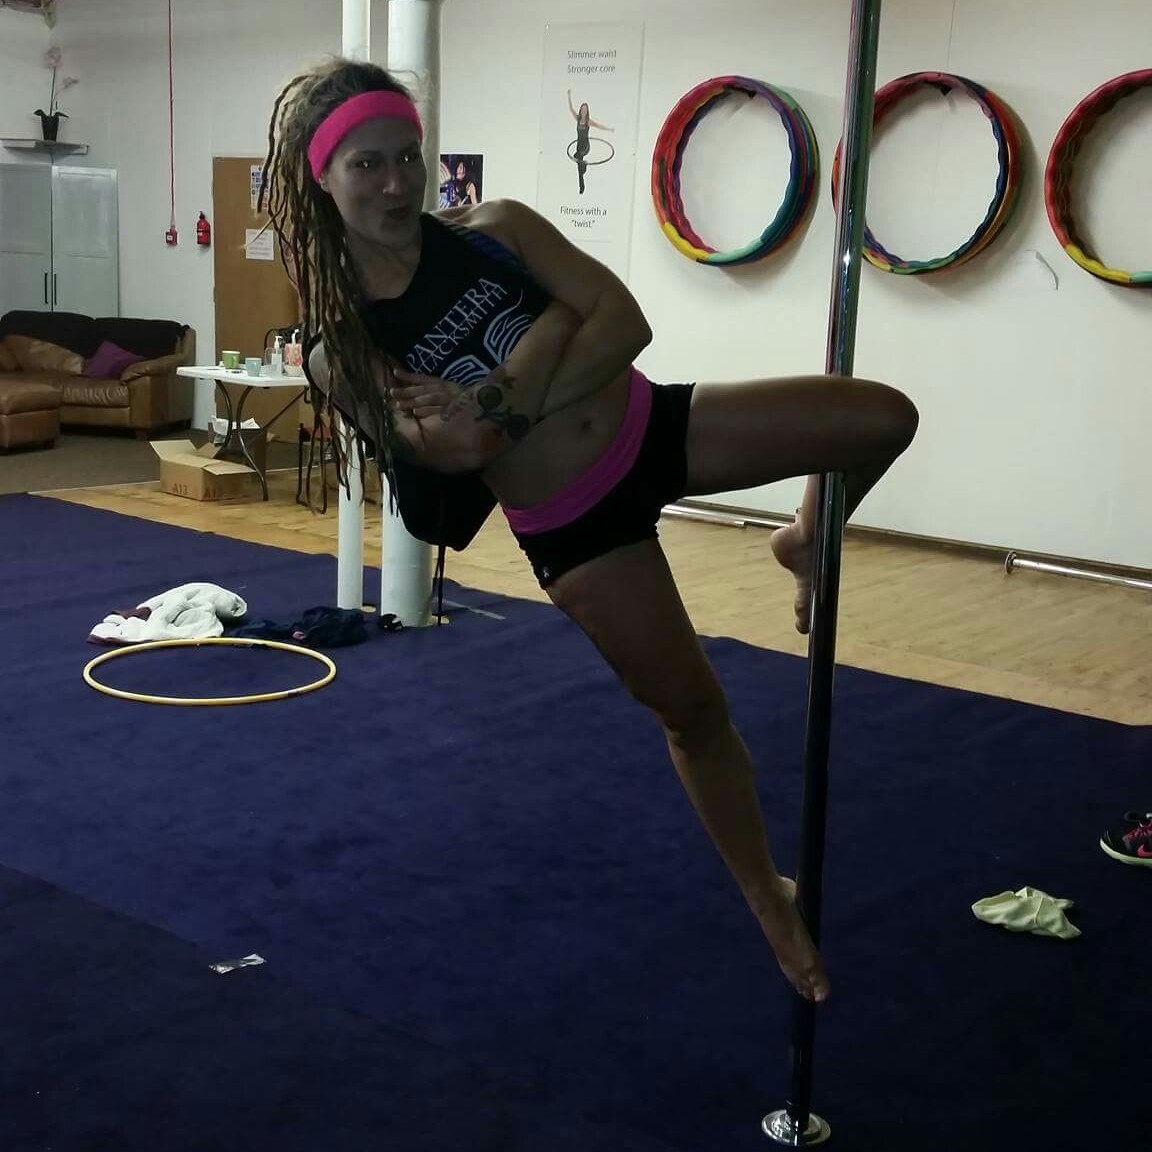
This old pic >>> was my first ever Cupid back in the day and, yes, I felt like a 100% cool dude landing this boss trick – and you should, too!
This post will be broken into 3 parts.
Part 1 = the nerdy bit. We’ll break down the anatomy of the Cupid and look at the key elements needed to achieve it.
Part 2 = the practical bit. We’ll explore some exercise programming ideas to help you build some Cupid-specific training into your off the pole Strength and Conditioning.
Part 3 = the skills bit. We’ll look a little closer at the skill side of the Cupid with my bonus Cupid cue that might just help you make more sense of this little love baby.
Part 1: Anatomy of the Cupid
If you have my book Pole Anatomy (Volume 1), you can turn to p38 now for extra credit. If you don’t have it yet and love pole nerdiness like me, whatcha waiting for? You can order a copy today.
If you’d rather watch than read, here’s a visual breakdown of the key elements of the Cupid:
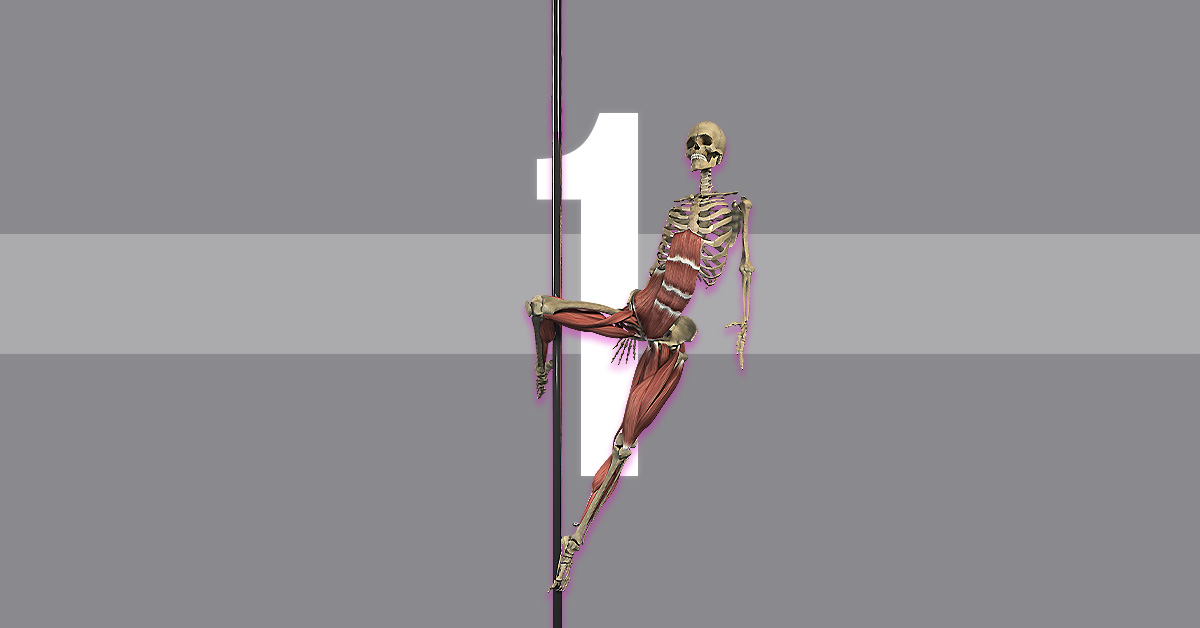
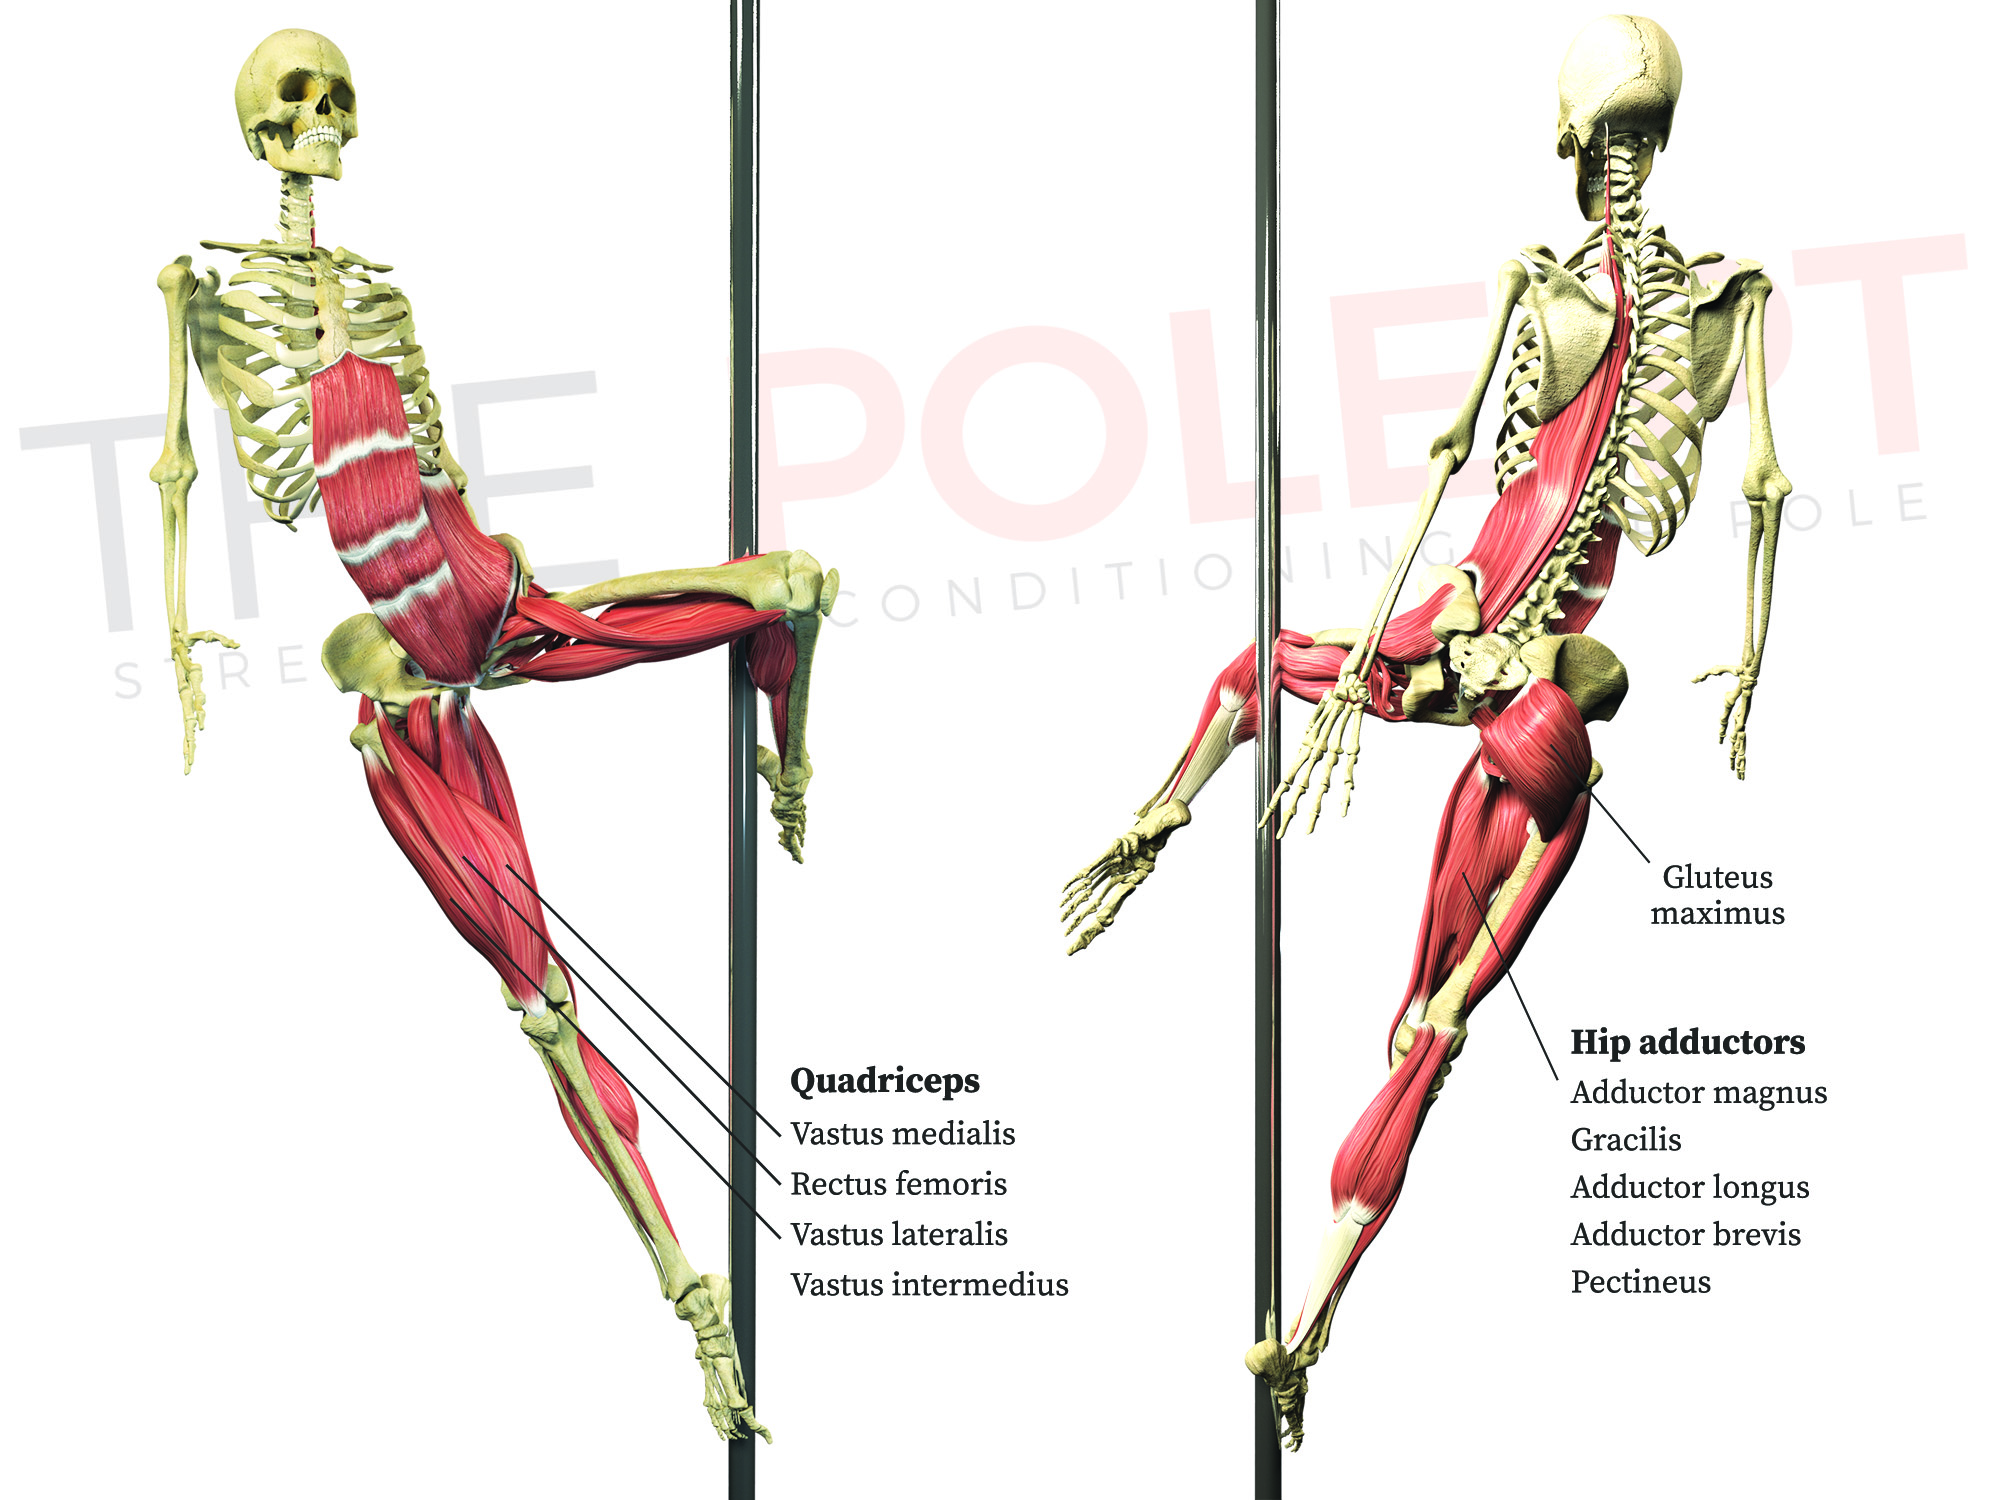
The Cupid position is secured through a combination of the ‘push’ from the bottom leg and the hook of the top leg around the pole.
Cupid Anatomy: The bottom leg
The main muscles responsible for the bottom leg ‘push’ are the quadriceps which work to keep the leg straight and the hip adductors which resist increased hip abduction. The glutes are also working to resist hip flexion and stabilise the position, along with the hip rotators.
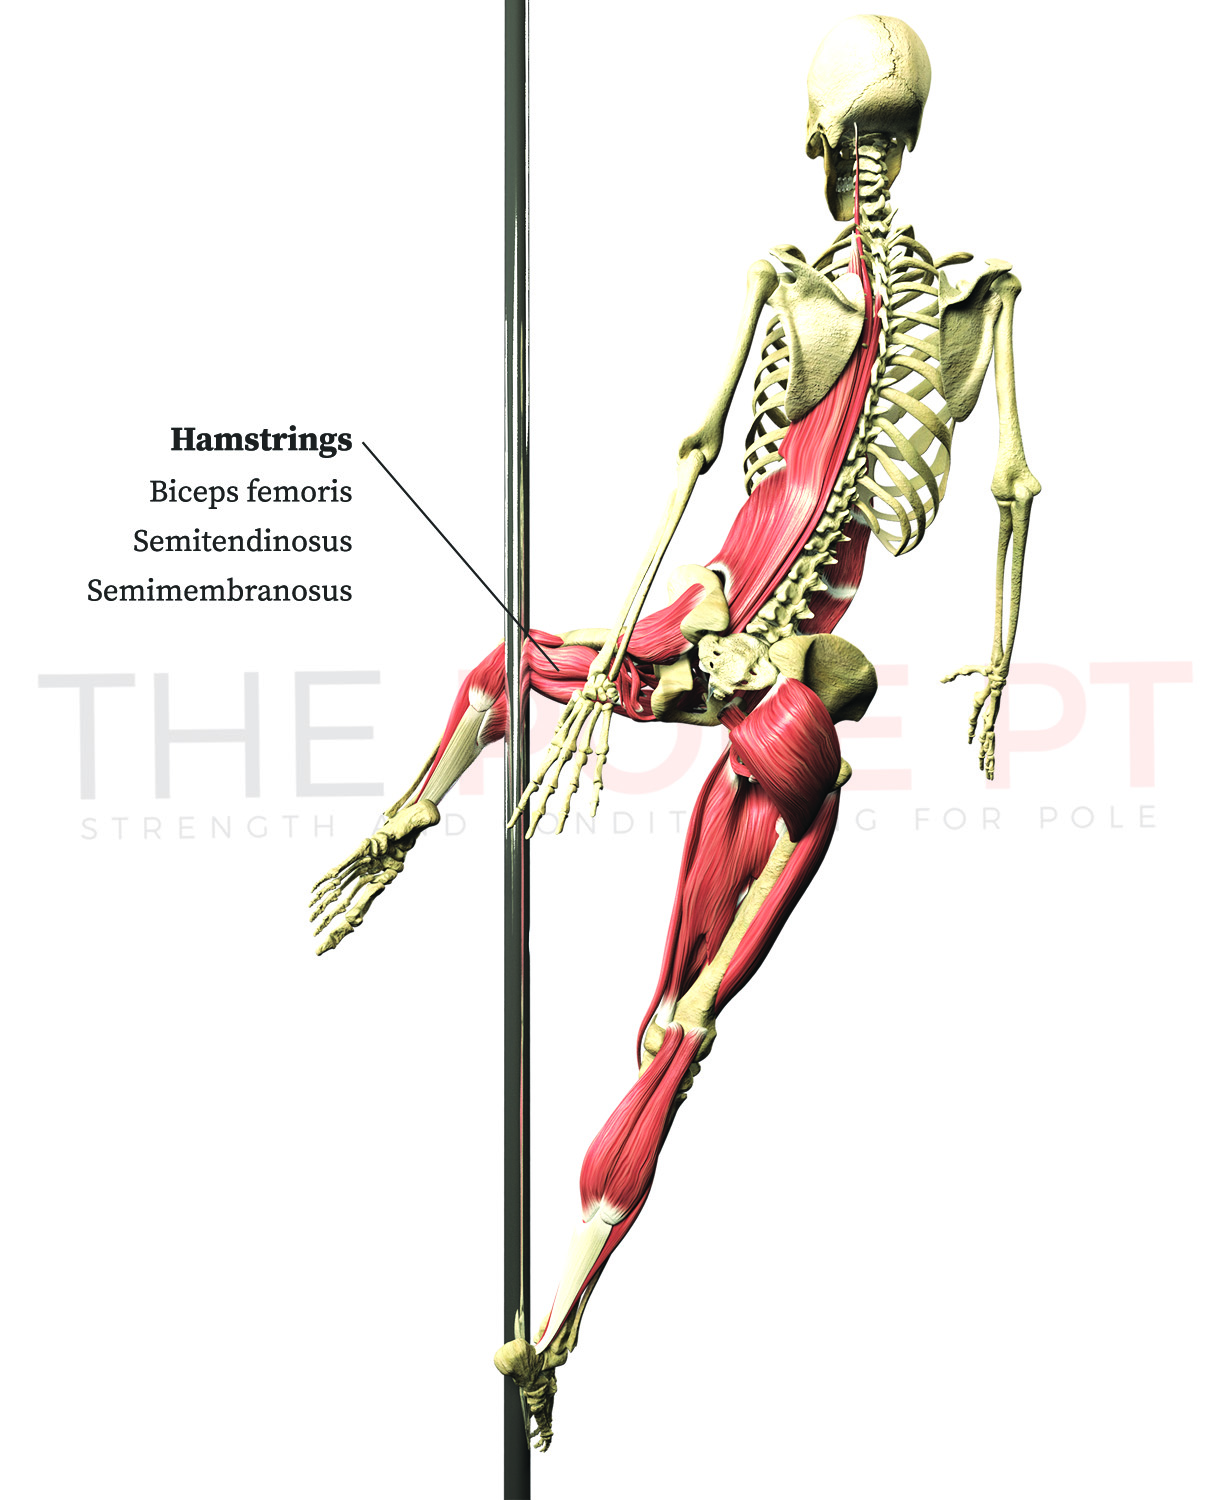
Cupid Anatomy: The top leg
The knee flexion of the top leg around the pole is held in place primarily by the hamstrings.
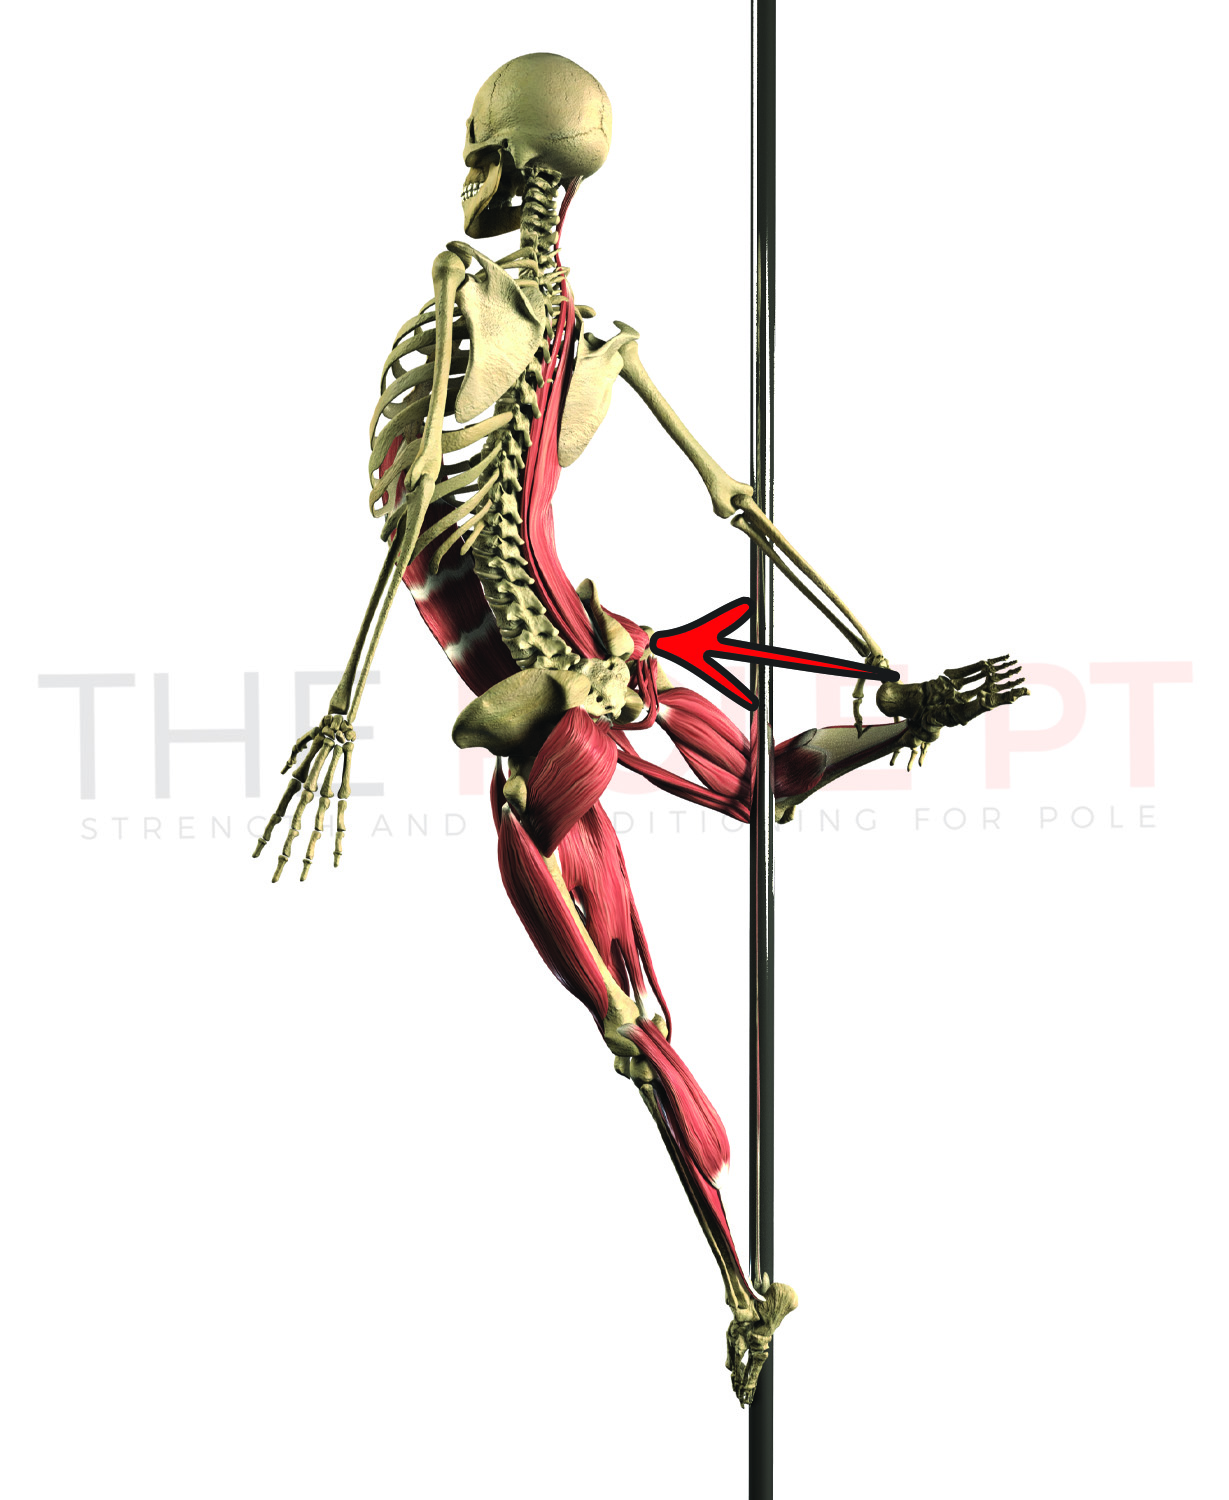
Most dancers will maintain some degree of hip flexion in the top leg. Bringing the hip into extension will make it more challenging for the hamstrings to maintain the knee flexion around the pole.

If we help the hammies out by holding the foot in place, this will ‘lock’ the knee flexion around the pole, requiring less active strength… buuuut this position can be more intense for the knee joint! So extra care should be taken to ensure we’re maintaining engagement and not forcing this position. Gradual progressions are important, especially when building up to this more challenging extended and ‘closed’ Cupid hold!
A wider leg position (Figure B below) will increase hip abduction (in other words, the legs will be wider apart) as well as hip flexion on the top leg and create a more challenging downward force. It’s not impossible to hold the cupid here, but it is less efficient IMO! If you can stack your torso over that bottom leg more like Figure A, you’ll be able to find that strong triangular sweet spot.
Magic!

Cupid Anatomy: what else?
Like Squiddly Diddly, the Cupid is all about ‘dem’ legs and the hip rotator muscles are also working to stabilize the position. Once you’ve stuck that sweet spot with the legs, the upper body position can be varied.
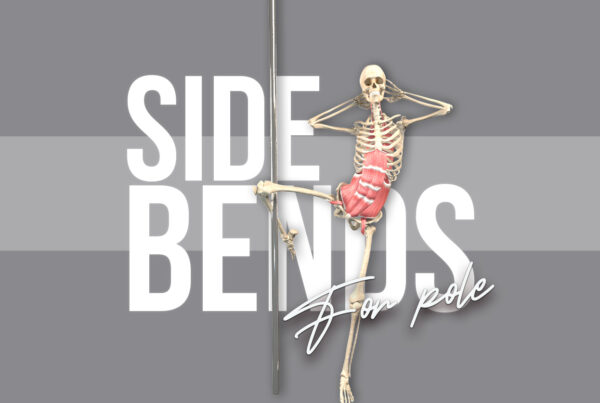
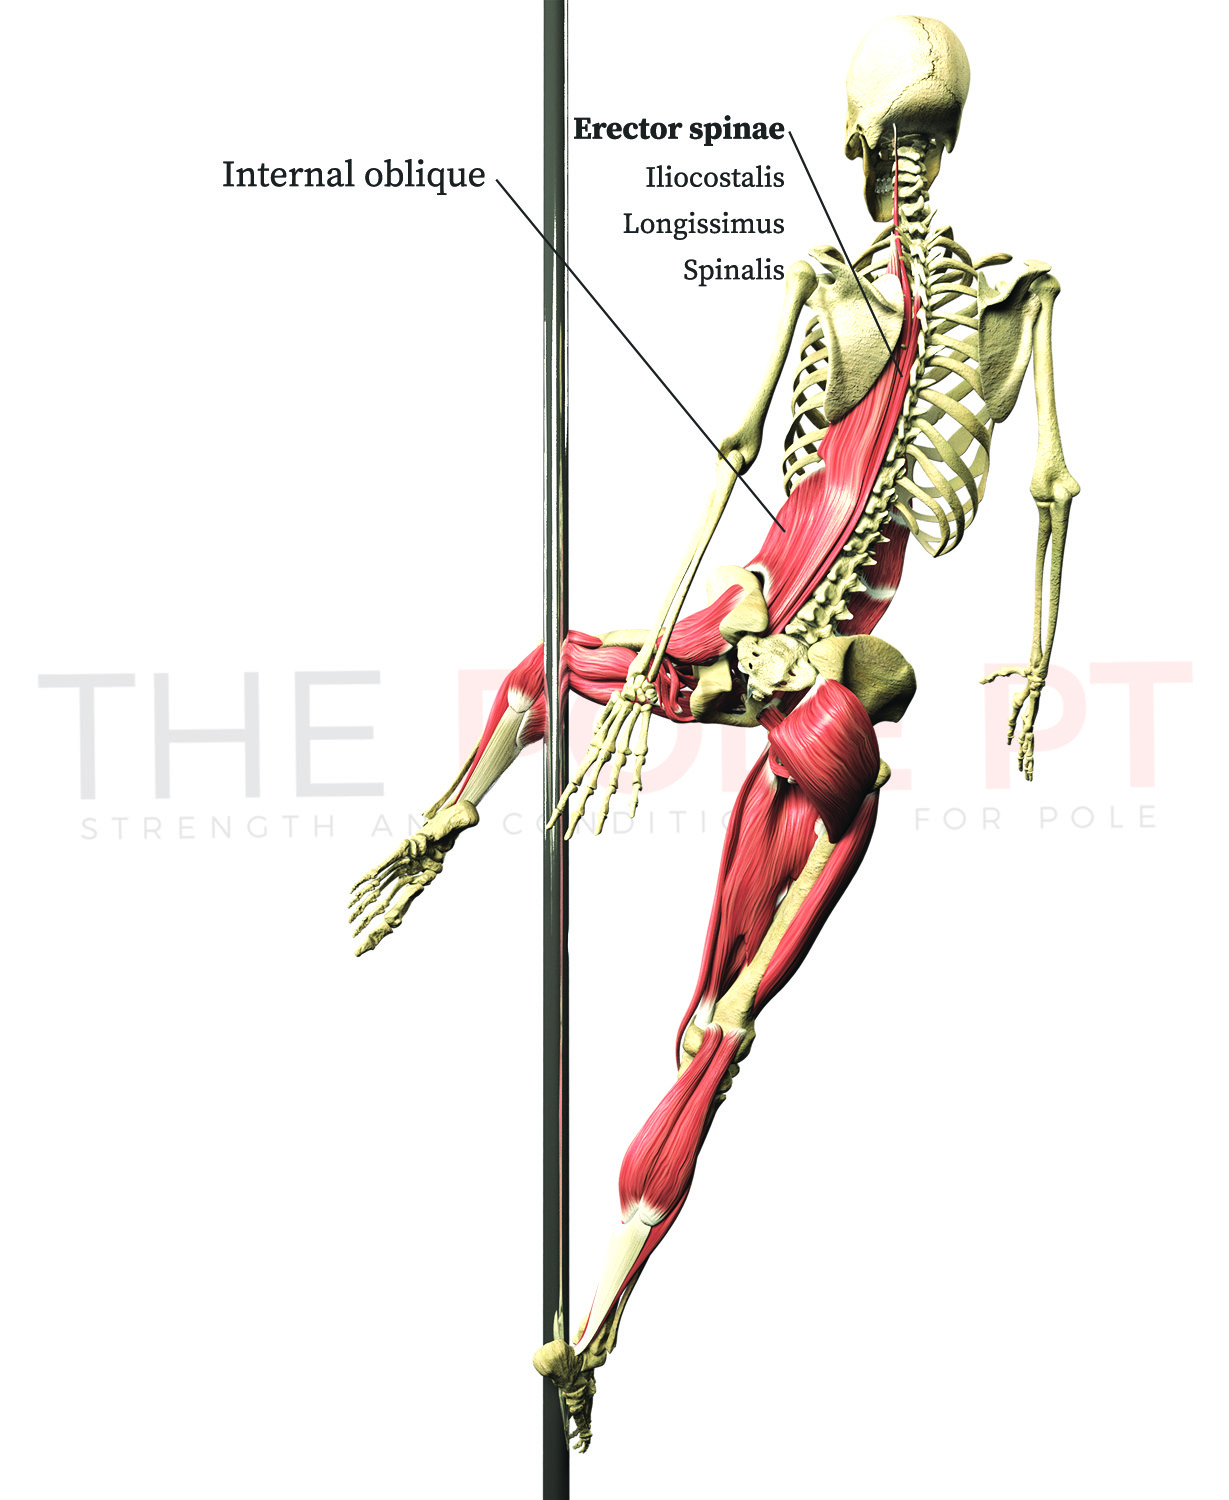
Our core musculature works to stabilize the torso in the air, particularly the internal obliques on the top side which are usually working to resist lateral spinal flexion away from the pole.
Got Cupid thoughts, questions, woes? Fire them over to me! I LIVE for pole move analysis!
Want more pole anatomy to nerd over? My book Pole Anatomy is out now and available in paperback or immediate ebook download!
Join me for Part 2 where we’ll apply this theory to create an off the pole Cupid workout focusing on all these key areas! >>No Pole Cupid Workout<<
Join my mailing list for free training advice direct to your inbox!
…including my FREE EBOOK “Grip Gainz – Grip Training for Pole Athletes” – with training drills and programming to help you achieve a vice-like pole grip.
I hate spam, too! When you join my mailing list, I’ll also notify you about new blogs and Pole PT updates that I think you might be interested in, but I’ll keep it to a minimum! You can unsubscribe at any time!