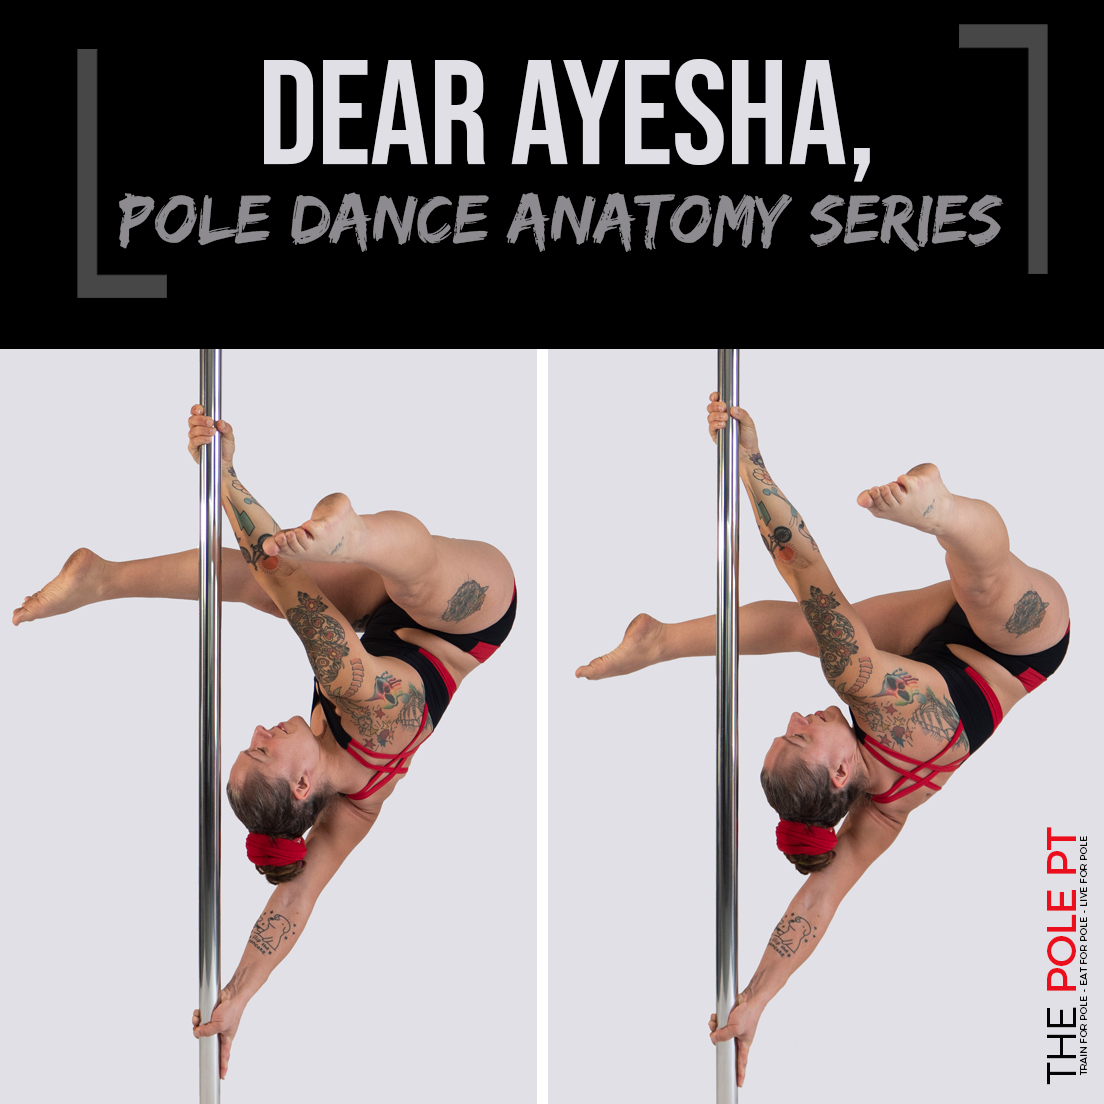
Dear Ayesha, we have questions. SO MANY QUESTIONS!
As part of my anatomy of pole series, I am looking this week at the Ayesha. In my last post we talked about the #1 stumbling block I see from pole dancers when trying to find the balance point in their Ayesha. If you haven’t checked that out yet, please take a read. It might unlock the key to finally conquering your Ayesha!
With that important piece of information off my chest, I received a lot of other great questions about this move, so I’ve answered them all as best I can below.
Q: Where should you look when doing the Ayesha?
A: There are so many important things running through your mind when trying to balance upside down on a vertical pole, that thinking about where your gaze is focused might seem a fairly minor point. However, this is a great question! Where you are looking can have a BIG impact on the lines of a move, but, more importantly, what you are seeing through your eyes plays a big part in your nervous system’s ability to process and understand where you are in space. This is one of the keys to body awareness and confidence in your Ayesha.
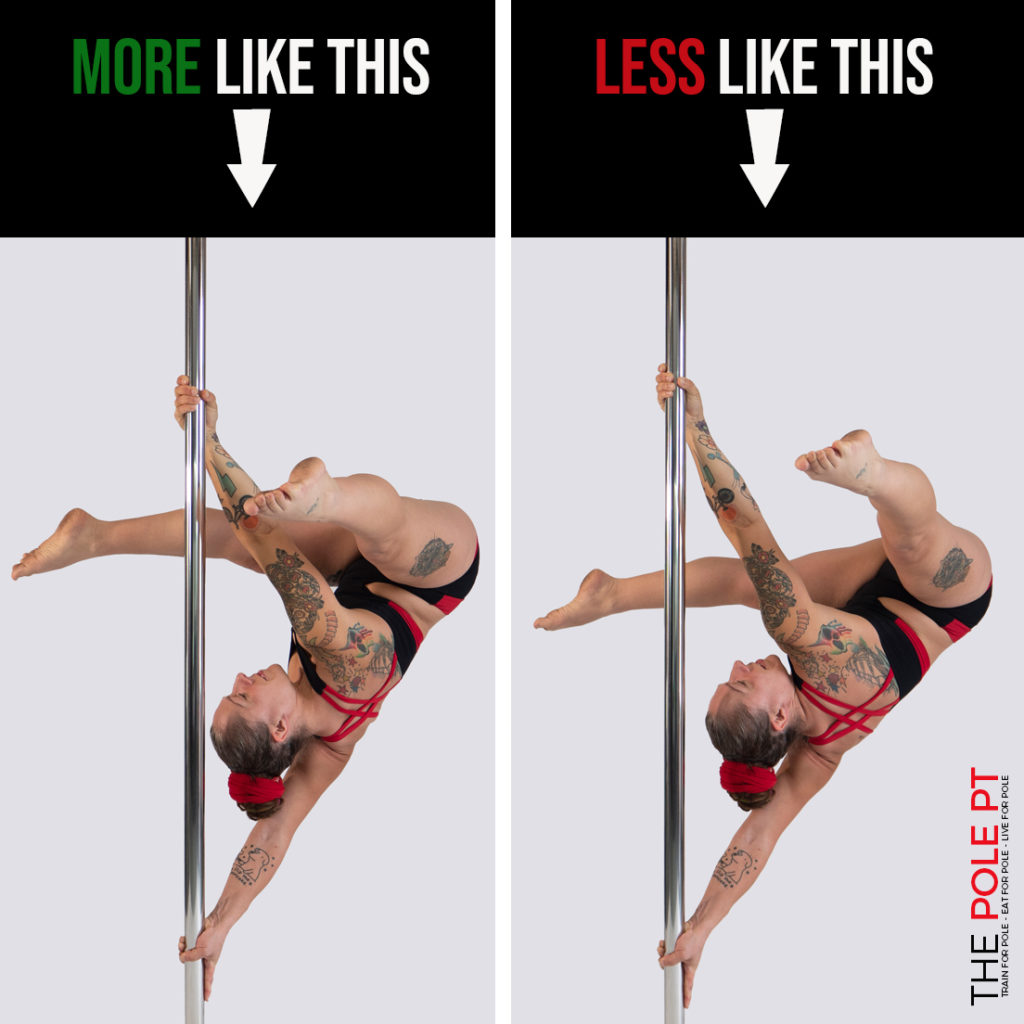
My advice is: try not to look at the floor! Target fixation is a powerful thing! Look up at the ceiling or up at your top hand instead. It will give you a better understanding of where you are in relation to the pole and help you to stack your hand, shoulder and hip in the most optimal way. When you feel comfortable in this move, you can also try having your ear more in line with your bottom arm – this will stop you from tucking the chin too much, keep your neck in a more neutral position and (in my opinion) create a better line.
Q: How do you come down safely?
A: Firstly, you should be using a crash mat for this move and a spotter! Your spotter should be able to help guide you out of the move safely.
That said, there are many awesome ways to come out of the Ayesha! For students who are first learning this move, having an exit strategy (or two) that they are comfortable with – and can execute safely is important.
You’ll need to be confident and strong enough to return your legs back to the pole if you need to, but I also like to teach students to exit the Ayesha by bringing both feet back down to the floor IN A CONTROLLED MOVEMENT!
Please don’t try this without a spotter and crash mats!
Be careful that you are not just flopping down out of this – it should be controlled, so get your spotter to help you slow that movement down until you are able to control it yourself. If you’re not quite ready for this yet, you can rehearse this exit from the floor like so…
Not only is this starting to get your body (and brain) used to the handspring (it’s kinda like a handspring in reverse), but I find that it helps build confidence, too. Knowing that you can bail on the move and land right back on your feet takes a lot of the fear out of ‘that moment’ – when you have to move your hips back away from the comfort zone of the pole. Arg!
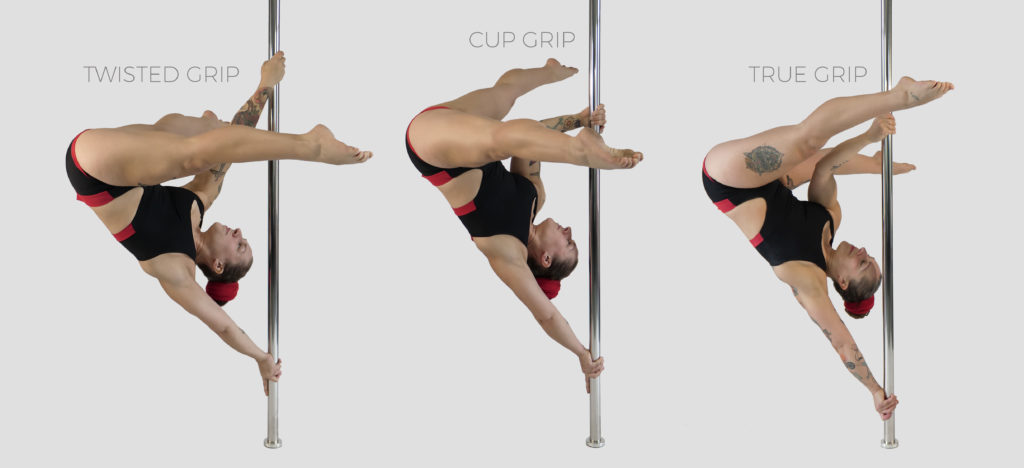
Q: What are the different types of grip? How do the different grips alter the stacking and positioning of the shoulders?
A: I actually covered a lot of this information in my 3-part series about twisted grip, so if you want to delve into the different grip positions a little more, go check out that post.
Very briefly, the bottom arm positioning is the same in all grips and requires 180 degrees of overhead flexion to stack the body optimally. More on that bottom arm and overhead flexion here: The #1 Reason your Ayesha Sucks.
In twisted grip, your top shoulder is internally rotated. While internal rotation tends to be a common injury point for pole dancers[1], it IS possible to perform this move safely with the right progressions and conditioning.
In true grip, your top shoulder is in a more neutral position, but the forearm is supinated, which can put pressure on your wrists and feel uncomfortable if your wrist mobility is limited.
In cup grip, your top shoulder AND your wrist are both in a more neutral position. This is why, even though it is considered the most difficult, cup grip is, anatomically speaking, the least complicated of all three grips! Yey cup grip!
It doesn’t matter which grip you are using, the aim of the game is to keep your shoulders engaged. For the bottom arm, think about the push coming from the shoulder, not just the arm. You can try this one armed downdog exercise to help you figure out what this engagement feels like whilst off the pole.
For top arm, think about keeping your chest lifted towards the ceiling and shoulder blade in a neutral position (it will feel like squeezing that shoulder back and down) – basically, you are trying to avoid rounding the shoulder forwards and allowing the shoulder blades to protract. This is particularly important for twisted grip, where it can be tempting to hang off that top shoulder without engaging it.
Q: I struggle to lock out my top arm in true grip – is this normal? I feel like I lose all control the more I try to lock it out.
A: It’s difficult to advise on individual situations like this without seeing what is happening with you in person, but here’s a few things to think about.
Firstly, we tend to be stronger in bent arm movements, so it could be that you are just naturally able to engage that ‘pull’ in your top arm better with the arm bent. With the top arm bent, you are able to use your bicep strength more, but as you straighten the arm, your shoulder stability and strength becomes even more important. It’s possible that you are losing your shoulder engagement as you extend your arm – that might be throwing you off, so keep an eye out for that!
Side note: This might be complicated even further if you tend to hyperextend at the elbows, because if you are trying to ‘lock out’ that top arm, you might be extending into a position where you do not have much stability.
To be honest, I don’t see an issue with keeping that top arm bent, but if you want to be able to do your true grip Ayesha with the top arm straight, try working on strengthening as well as scapula awareness in a straight arm pull position off the pole first. For this, I’d recommend rows like those in the video below, but do the movement real slow and pause for 5-10 second holds at the position where your arms are straight so you can actively hold that position isometrically, making sure that you are keeping the shoulder engaged in a neutral position (it will feel like squeezing the shoulder blades towards each other as you will need to create that tension there to stop them rounding forwards).
Q: Why does entering Ayesha from a handspring work so much easier for some people than lowering into it from a basic invert? How do I find that sweet spot for hand placement so I feel stable without faffing around?
A: This is really common and my theory on this is twofold: Firstly, dropping the hips back into the Ayesha has a bigger fear element – you are already upside down and you have to basically remove the contact point with your legs. Farewell safety net! If you are not yet sure whether you can hold your weight in your arms only, this is a pretty terrifying moment in comparison to the handspring, where you begin the move with your feet on the safety of the floor.
What’s more, the release of the legs and the movement of dropping the hips back from an invert position can be done slowly – there is a lot of time for over-thinking and a lot of things to think about! Damn you, monkey brain!
Conversely, when we kick up from a handspring, there is a magical ‘landing point’ which is created when we hit the sweet spot of pushing through the bottom arm, pulling with the top arm and engaging our core to keep our body still. There is no way that we would be able to land our Ayesha position from a handspring unless we actively engage all of these points.
When we drop back into the Ayesha from an invert, without the dynamic aspect of the handspring, that engagement point is less likely to happen automatically. We need to actively create the tension that seems to happen so magically when we handspring.
Next time you try your Ayesha from an invert, before you even begin to take the hips back, ACTIVELY pull with the top arm, push through the bottom arm, make sure your shoulders are engaged, pull your belly button to spine to engage the core and squeeze everything tight! Imagine the effort required when you land your Ayesha from a handspring – you need to put the same effort in here, too!
Q: What are the baby steps to Ayesha for beginners? Every student wants to do this move before they are ready!
A: EVERYONE wants to nail their Ayesha – like, yesterday! Hey, I’ve been there too. I was SO desperate to get this move when I started poling. But remember that the Ayesha is an advanced move. Slowly and consistently layering progressions over time is not only the safest but also the most efficient way to build strength. Yey consistency!
Let’s break the Ayesha down a little bit. It requires a good range of overhead mobility ✔ (more on that here: The #1 Reason your Ayesha sucks), overhead pushing strength ✔ horizontal pulling strength ✔ awesome shoulder stability ✔ ninja level core strength ✔ a decent amount of active hamstring flexibility and strong quads to keep the legs straight. ✔
So in terms of baby steps, exercises that work on all of these aspects (off the pole) will be super helpful. Of course, on the pole progressions are important too (this is a skill requiring technique after all), but I’ve put some of my favourite progression exercises for Ayesha strength below. If you have students that are itching to Ayesha, work on these progressions with them alongside the usual pole progressions and make sure they understand that they need to be strong in all of these elements to be able to perform the move strongly.
Because training on the pole is just so much fun and awesomeness, it can be difficult getting students to do these kinds of conditioning exercises. But when they understand how it directly relates to that pole move they have been dreaming of, they’ll be a lot more enthusiastic about getting them done.
If you want to check out all of my progressions and training approach for the Ayesha, my 6-Week Online Ayesha Foundations programme is now available to start TODAY!
Overhead pushing strength for the Ayesha
Once you’ve got your overhead mobility on point, here’s one of my favourite overhead pressing progressions for the Ayesha/handspring: the one armed downdog.
You’ll see that the end position of this movement replicates our Ayesha – the bottom hand, shoulder and hips are stacked in a line. Magic.
Horizontal pulling strength for the Ayesha
Bodyweight rows using a suspension trainer are awesome for developing the pulling strength needed for your Ayesha/handspring. I usually start with two handed rows and progress clients to rotational one-armed rows that are a little more pole-specific (let’s face it, it’s not often we’re doing the same thing with both arms!).
Progressing to…
Active hamstring flex and quad strength for the Ayesha
My current favourite exercise for this has to be these killer straddle leg lifts. Cry now; thank me later.
Core strength for the Ayesha
In our Ayesha, we need a lot of anti-rotation and anti-lateral core strength to keep our hips square. Please make sure you have a good foundation of ‘basic’ core strength first – before adding ‘anti-rotation’ movements like those below into your core training. If you/your student cannot yet hold a basic plank position for 3 sets of 60 second holds, work on that first before adding these variations to your plank.
Q: I feel pain in my left forearm after it’s been in the down position in Ayesha. Only started working on Ayesha a month ago so I take it slow to build up strength. Is it due to imbalance and how to deal with it?
A: Firstly, props to you for taking your time to build this up slowly – it is the best way!
Secondly, if you are feeling pain, please go see a physiotherapist – preferably one that specialises in circus/gymnastics or at least sports rehab – they’ll be able to do a hands-on investigation and help you figure out the reasons as well as give you exercises to help prevent further pain and injury. It’s beyond my scope of practice to advise on that.
That said, I hear this ‘pain in the bottom arm’ from Ayeshas and handsprings quite often and sometimes a simple correction of technique can eliminate it.
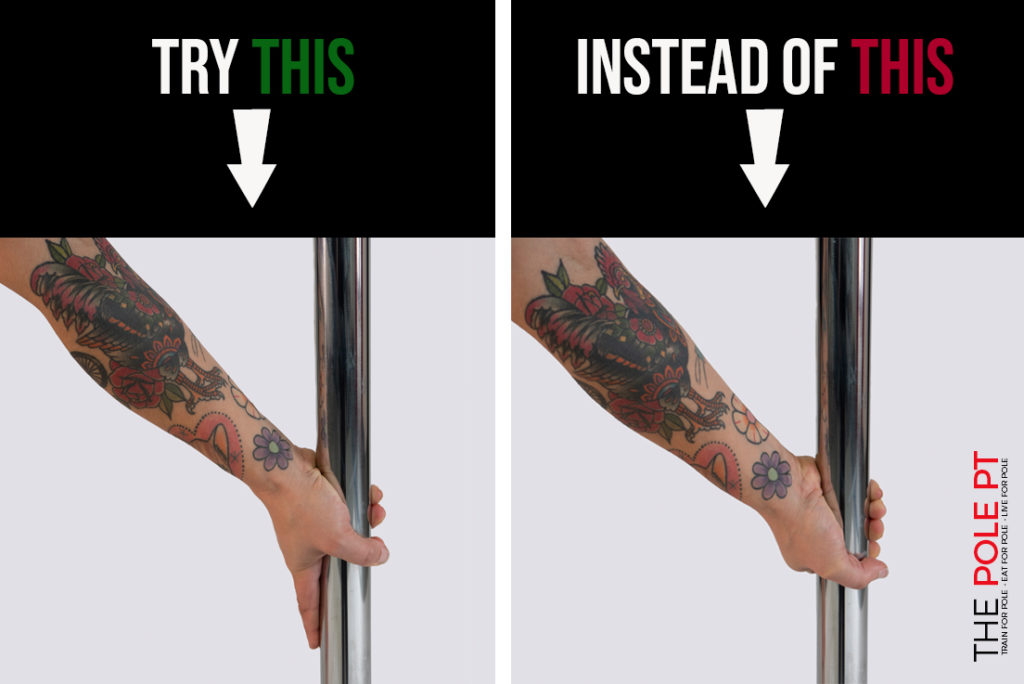
Our hand/wrist positioning can be awkward in the bottom arm of our Ayesha. If we hold the pole with all fingers wrapped around it, it can put our wrist into a position called ‘ulna deviation’ – this is the side bending movement when the pinky finger side of our hand moves closer to our wrist.
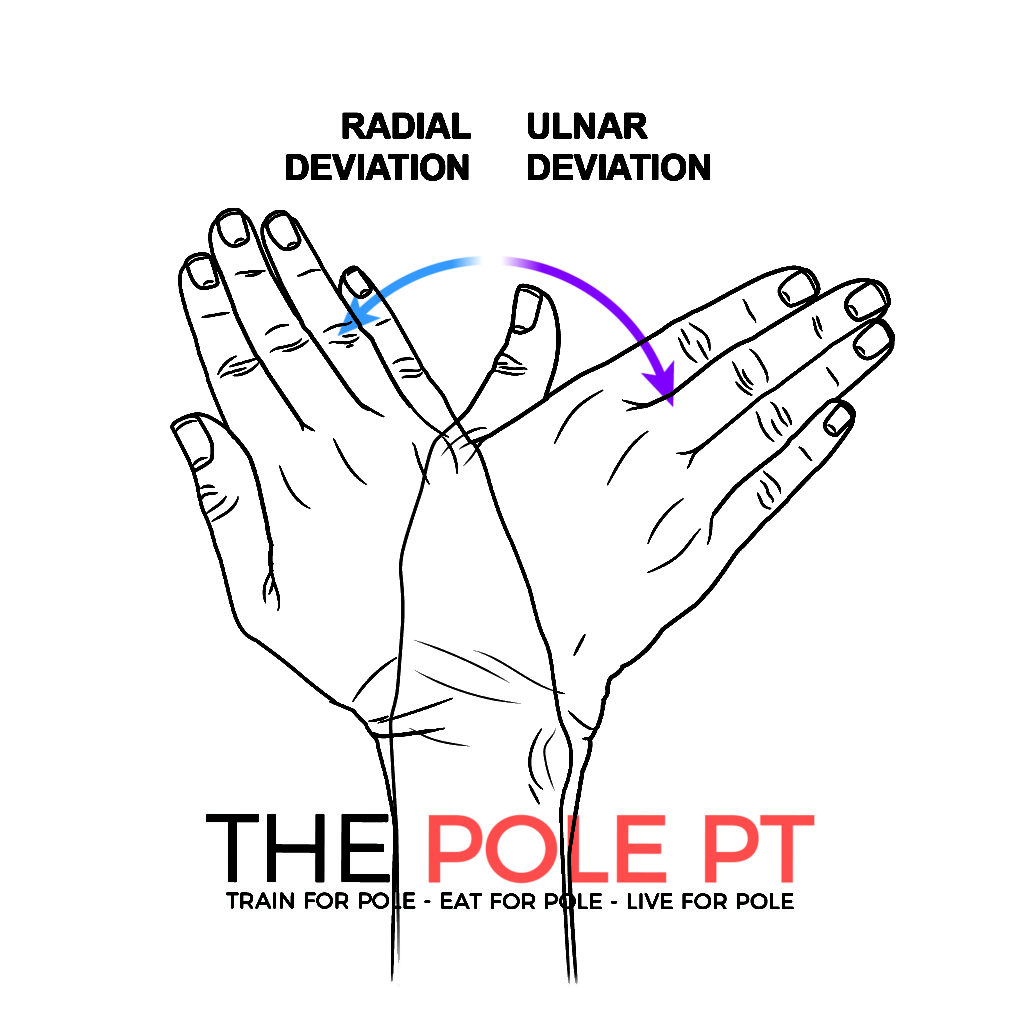
Weight bearing here can put unnecessary pressure on the soft tissues around our wrist. If we instead point our trigger finger down the pole, as demonstrated in the image below, we put our wrist into a more neutral position where it is stronger and most protective of the wrist joint.
It’s worth a try to see if this helps, but there might be other things going on here, too. Other things to look out for on that bottom arm are: hyperextension of the elbow and shoulder engagement – these things can also lead to pain and are worth exploring with a physiotherapist and/or strength coach in person.
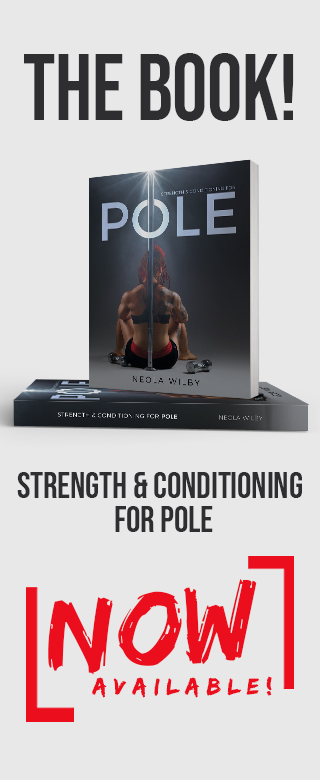
If you’d like to geek out more with me on the anatomy of pole dance, or you want more details on how to programme these exercises, check out my books – Strength and Conditioning for Pole – and Pole Anatomy which are both available now in hard copy or downloadable ebook.
Questions? Just ask! + Please tag me on social media with your Ayesha wins – I love to celebrate with you all! I’m on insta @ptthepole and Facebook @thepolept
Want a little more structure for your Ayesha training?
My book, Strength and Conditioning for Pole, contains everything you need to create your own strength training programme for pole, so you can start turning your pole daydreams into reality – Ayesha and beyond!
Or, if you really just want a ‘done for you’ 6-week Ayesha-focused training plan that you can download and start today my 6-week Ayesha training progam is the one! It contains all the nerdy theory and the exercise progressions to get you there!
Join my mailing list for free training advice direct to your inbox!
…including my FREE EBOOK “Grip Gainz – Grip Training for Pole Athletes” – with training drills and programming to help you achieve a vice-like pole grip.
I hate spam, too! When you join my mailing list, I’ll also notify you about new blogs and Pole PT updates that I think you might be interested in, but I’ll keep it to a minimum! You can unsubscribe at any time!

You’re a rockstar for putting together such a great post!!!
This kind of instruction is why your book is so helpful! I got it three months ago and it help me put together a good “off the pole” game plan to help me retain strength while I nurse a hamstring injury!
Thank you soooo much! 🙂 I’m so happy the book is helping you get through your recovery! ????