There’s this funny thing about pole that no-one tells you at the beginning. It’s the thing that makes pole infuriatingly challenging, but simultaneously appealing to our goal-driven personalities: It NEVER ends!
Yup. You’ll finally land that ‘must-have’ trick after months/years of uphill effort, happily place a big fat tick and smiley face next to that move on your list – and hell yeah you better be celebrating that moment (that’s a given!) – but the mission is not complete.
The Pole Gods do not stay appeased for long – you’ve really only just begun!
That big fat trick tick suddenly opens up a whole new sub-list of goals: putting it into combos, transitioning in and out of it, working on more advanced versions and perfecting the finer details.
And so it goes with the invert! No sooner have you got your no kick invert on point, than you find yourself staring up at a fresh mountain to climb: mastering your invert with straight legs!
It’s the never ending, forever moving goal mountain that is pole – but that’s one of the reasons we love it, right?
If you’re currently staring up at the straight leg invert mountain, trying to plot your route to the summit – this blog post is for you!
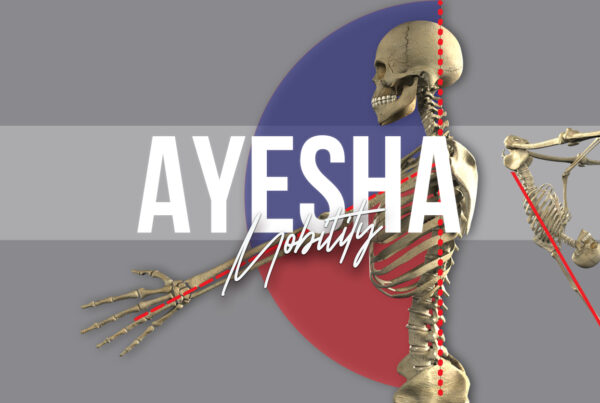
Why is the straight leg invert so much harder than the bent leg version?
If you’re struggling with your straight leg invert, it’s probably one of the following 3 areas (or a combination of them) that is blocking you from achieving the beautiful straight leg invert of your dreams.
In comparison to the bent leg invert, we need:
✔ More core strength
✔ More hamstring flexibility
✔ More hip flexor strength
No wonder turning our bent leg invert into a straight leg invert is so tricky! Let’s take a closer look at these key areas – and how you can work to strengthen each one.
*For the purposes of this blog post, I’m assuming you’ve got your bent leg invert absolutely nailed with no momentum. If not, go back to take a look at my other invert blogs (you can start here) before working on this!*
1. More core strength!
Our core needs to stabilise our trunk for everything else to work seamlessly. If this aspect falls down, the whole thing will fall down! Gah!
The further away our feet are from our midline, the more demand we place on our core stability! With our legs straight, we are creating a longer lever from our body, which makes the core demand significantly higher.
2. More (active) hamstring flexibility!
Inverting with the legs straight requires hamstring flexibility that we didn’t have to worry about in the bent leg version. We need over 90 degrees of hip flexion to perform the straight leg invert efficiently!

2. More hip flexor strength!
The muscles that are responsible for lifting our legs close to our torso as we invert are our hip flexors. Primarily our psoas and illiacus assisted by our secondary hip flexors (rectus femoris, TFL and sartorius).
With our legs straight, those hip flexors are already working harder because of that longer lever and the force of gravity – yay physics!
But there’s an added challenge for our hip flexors, too: once our legs get close to and beyond around 90 degrees of hip flexion, with the legs straight, those secondary hip flexors lose some of their hip flexion powers.
Long story short: with our legs straight, our psoas and illiacus are gonna have to be ready to step it up big time!
EXERCISES FOR THE STRAIGHT LEG INVERT
EXERCISE 1: CORE STABILITY
If you can bent leg invert, you should already be able to maintain your core engagement while performing the lying invert tuck below. If you can’t, please stick with this exercise before moving on to the straight leg progressions!
Got the bent leg version nailed? Awesome! Now you can work on the straight leg progressions below to create a super solid base of core stability for your straight leg invert. Remember, without this strong foundation, the whole thing is doomed – never underestimate the importance of core stability!
The exercises below are demonstrated in a pike position, but you can also add a straddle movement.
Progression 1: Lying straight leg invert (one leg)
Progression 2: Lying straight leg invert (negative)
Progression 3: Lying straight leg invert
EXERCISE 2: ACTIVE HAMSTRING FLEXIBILITY
As mentioned, we need over 90 degrees of hip flexion to perform the straight leg invert efficiently.
To check that you have enough passive range here, sit on the floor with a flat back. If you cannot achieve at least an upright seated position without rounding your back or bending your legs, then you will probably need to take a step back and work on your mobility/movement mechanics first!

Able to achieve the position with a flat back? Awesome, then we can work on strengthening your quads and hip flexors so you can achieve that end range actively in the air. Yay!
In the exercise below, we’re working the hip flexors at > 90 degrees of hip flexion with the legs straight, so we’re really isolating the psoas and illiacus, which are those hip flexors that will need to work hardest in our straight leg invert, as well as the quads that need to stay engaged to keep our legs straight, too!
Progression 1: Pole seated pike lift with support
Progression 2: Pole seated pike lift with flat back
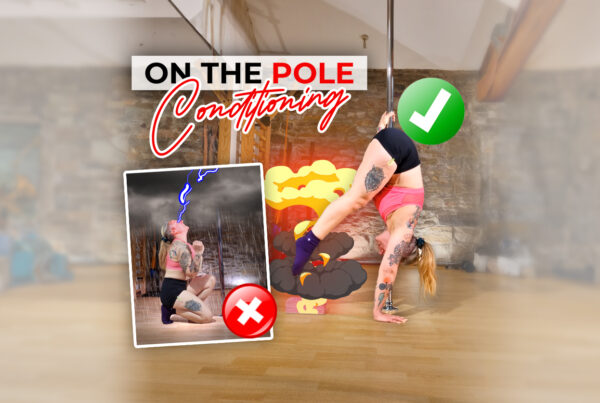
EXERCISE 3: STRAIGHT LEG INVERT ‘ON THE POLE’ PROGRESSION
Here, we’re combining all elements, together with the upper body demands of the actual invert, but performing the movement in reverse. Training the ‘negative’ of the movement like this is easier than lifting up, but it uses all the same muscles we need for the lift, so it’s great for building strength.
Progression 1: Straight leg invert negatives (one leg)
Progression 2: Straight leg invert negatives (straddle)
Progression 3: Straight leg invert negatives (pike)
I hope these exercises help you on your way to that straight leg invert!
Finally, because I’m feeling that way out – I leave you with a quote from one of my main philosophical inspirations in life, Dr Seuss…
You’re off to great places! Today is your day! Your mountain is waiting, So… get on your way!
Dr Seuss
Want to learn how to programme your strength training for pole? My book, Strength and Conditioning for Pole is available now – fully illustrated with over 400 pages of pole nerding!
Join my mailing list for free training advice direct to your inbox!
…including my FREE EBOOK “Grip Gainz – Grip Training for Pole Athletes” – with training drills and programming to help you achieve a vice-like pole grip.
I hate spam, too! When you join my mailing list, I’ll also notify you about new blogs and Pole PT updates that I think you might be interested in, but I’ll keep it to a minimum! You can unsubscribe at any time!