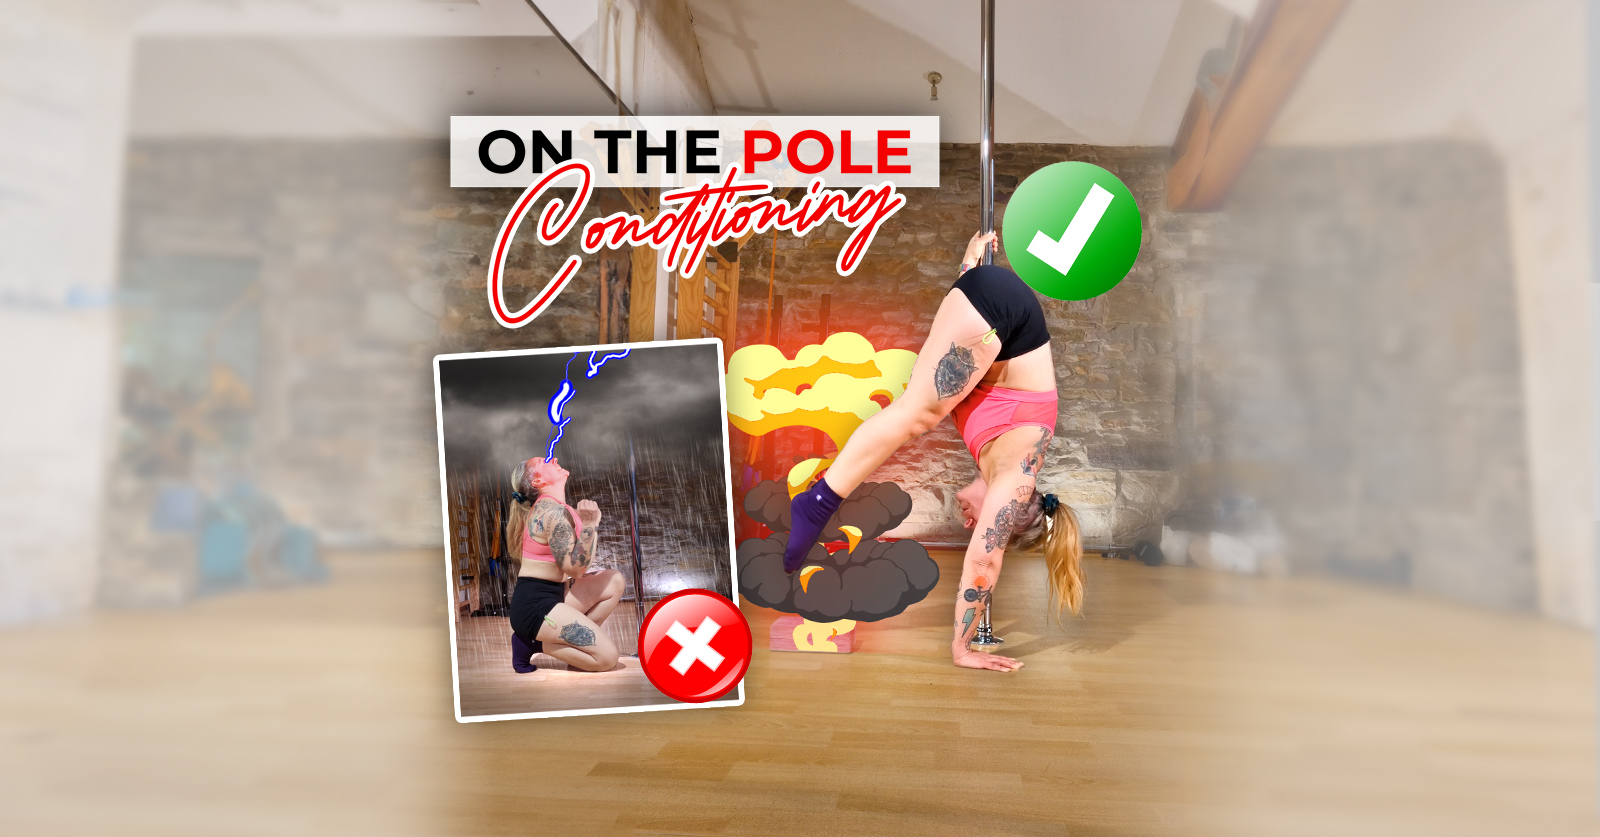
You’ve been working diligently on your pole handstand deadlift… you’ve got the hamstring flexibility for that pike position ✔️ your overhead mobility is on point ✔️ you’re feeling strong as an OX in that bottom arm push ✔️ annnd you can kick up into your handstand and lower down slowly like a champ! ✔️
You’re SO ready for your handstand deadlift!
So WHYYYY does that initial lift off the floor still feel as impossible as wiggling your ear?
First of all – high fives for getting this far with it! The handstand deadlift is a complex skill with many different components. It takes a lot of strength work (not to mention patience, LOTS of patience!) to get this far with it.
It’s frustrating to be *this* close to a skill and yet feel a zillion miles away at the same time! The pole rage is real!
In this post, I’ll share some pole conditioning exercises focused on breaking through that final sticking point.
Rather watch than read? Here’s a quick video summary of this post! As always, keep on scrollin’ for more detail and full cues for the exercises below!
These exercises are more advanced variations of my two favourite conditioning drills for the pole handstand deadlift. I find them useful for those who have been training negatives (slow lowers) and lift ups from a raised surface already and who feel super confident with those movements, but are still getting a massive ‘nope’ on the initial lift.
Always consult your coach or healthcare provider to check if exercises are suitable for you!
Not quite there yet? You can find all my earlier exercise progressions in my Pole Handstand Deadlift Workbook – it’s a 6-week training workbook with anatomy nerding and videos for every exercise! Or check out my free blog post Happy Handstanding | 3 Pole Handstand Deadlift Progressions for a few alternative progressions!
Pole conditioning exercises for the pole handstand deadlift
Exercise 1 – An advanced variation of the slow lower
This exercise can work like magic for getting through that initial sticking point and it’s SUPER simple: instead of coming all the way to the floor in your slow lower, just add a lift back up, *right* before you get to the point where you can’t control it. Over time, the aim is to get lower and lower until eventually… BAM! The elusive lift off the floor is yours!
Check out the video for all the key exercise cues!
Exercise 2 – An advanced variation of the elevated lift off
If you’ve already been training the lift from a higher surface, this slight variation adds a little extra challenge. Lift from the slightly higher surface as usual, but then instead of lowering and ending the movement there, tap lightly and then lift right back up again. The goal is to reduce the height over time until eventually the once impossible float is a piece of cake!
Check out the video for all the key exercise cues!
Pah! What gravity?!
Why do exercises like this work?
Why, it’s actual magic, of course!
But that ‘actual magic’ is really just exploring novel ways of approaching the movement that allow you to really focus your efforts into and around (as close as possible to) the ‘sticking point’.
Not only does that help you build muscular strength and control around that sticking point, but it also gives your brain more information about that part of the movement pattern, helping you build that ‘brain-body’ connection that is missing from the start of the lift. Like I said: Magic!
A couple of other things to check in on!
There are MANY different elements to the pole handstand deadlift! In this post, I’m assuming you’re pretty far into your pole handstand deadlift training, so I’m not covering all the basic elements needed for this trick, but here’s a couple of other key things that are still worth reviewing if you’re at this stage where everything feels strong *except* that very initial start point:
- Your hand positioning! Make sure you don’t have your inside hand too high and don’t be afraid to play around with the positioning! Even tiny adjustments like bringing your inside hand down just an inch, or moving your inside shoulder slightly further away from the pole, can make a world of difference! You can find my standard set up suggestions here – but play around! It’s important to find your own sweet spot!
- The pike position! If you aren’t already including them in your training, working on ‘compression strength’ focused exercises off the pole, that help you work on engagement in that starting pike position, like this and this can also help your brain-body to connect the dots of what to engage for the initial lift off the floor.
You’re soooo close! Stick with it! All the effort will be worth it!
And if you’re not quite there yet… you can find all my earlier exercise progressions in my Pole Handstand Deadlift Workbook – it’s a downloadable 6-week training workbook with all the nerdy anatomy details, gradual progressions and videos for every exercise!
Pole handstand lift off – here we come!

Join my mailing list for free training advice direct to your inbox!
…including my FREE EBOOK “Grip Gainz – Grip Training for Pole Athletes” – with training drills and programming to help you achieve a vice-like pole grip.
I hate spam, too! When you join my mailing list, I’ll also notify you about new blogs and Pole PT updates that I think you might be interested in, but I’ll keep it to a minimum! You can unsubscribe at any time!