If you missed my first post where we investigated the biomechanics of the pole handstand, go check that out here first or watch the quick summary video below. The tips in this post will make more sense if you do!
Struggling to land your pole handstand?
Before we dive into my handstand set-up tips, please know that there are a multitude of factors which can impact your ability to lift into and hold the handstand position.
This post is focused on the ‘skill’ side of that, but if you can’t bring your arm fully overhead to 180 degrees, if your wrist mobility is limited, if you don’t have the necessary shoulder and/or core strength and stability, all the skill training in the world won’t get you into a handstand that feels good.
Working on these basics first before exploring the handstand movement is truly what will set you up for handstand success! You can find out about some of these elements in my handstand posts here (on shoulder mobility) and here (on wrist mobility).
If you’ve got those foundations nailed and you’re STILL struggling to land that gloriously floaty handstand sweet spot, it’s a good time to analyze your positioning and explore the technique of the skill itself.
Rather watch than read? I got you! You can watch a video summary of all these tips below!
3 tips to set your pole handstand up for success!
Your own positioning ‘sweet spot’ will depend on many factors, not just your own strengths and individual body mechanics, but also any aesthetic goals and how you’re planning to transition in and out of the handstand position, but here’s how I usually cue the set up for the pole handstand (and why) so you can start to explore what feels right for you – a small adjustment can make a huge difference!
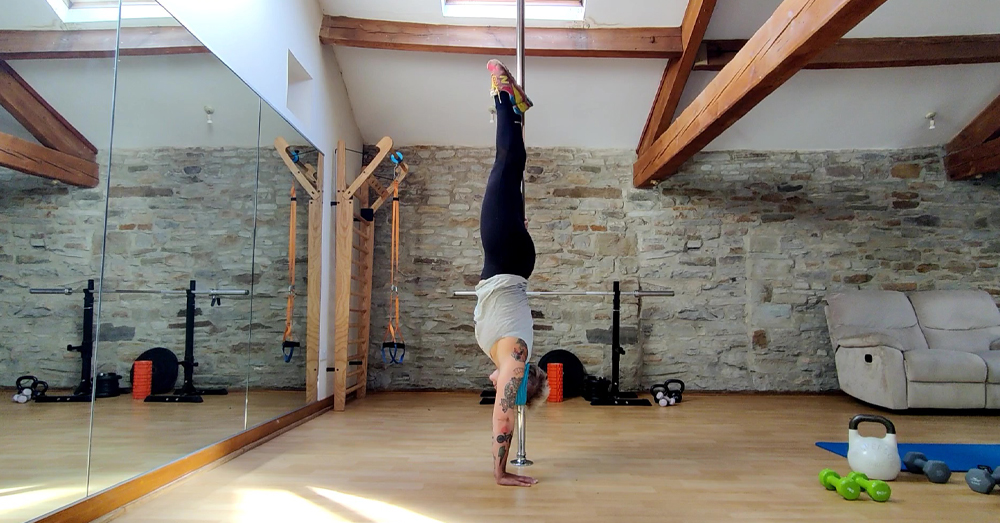
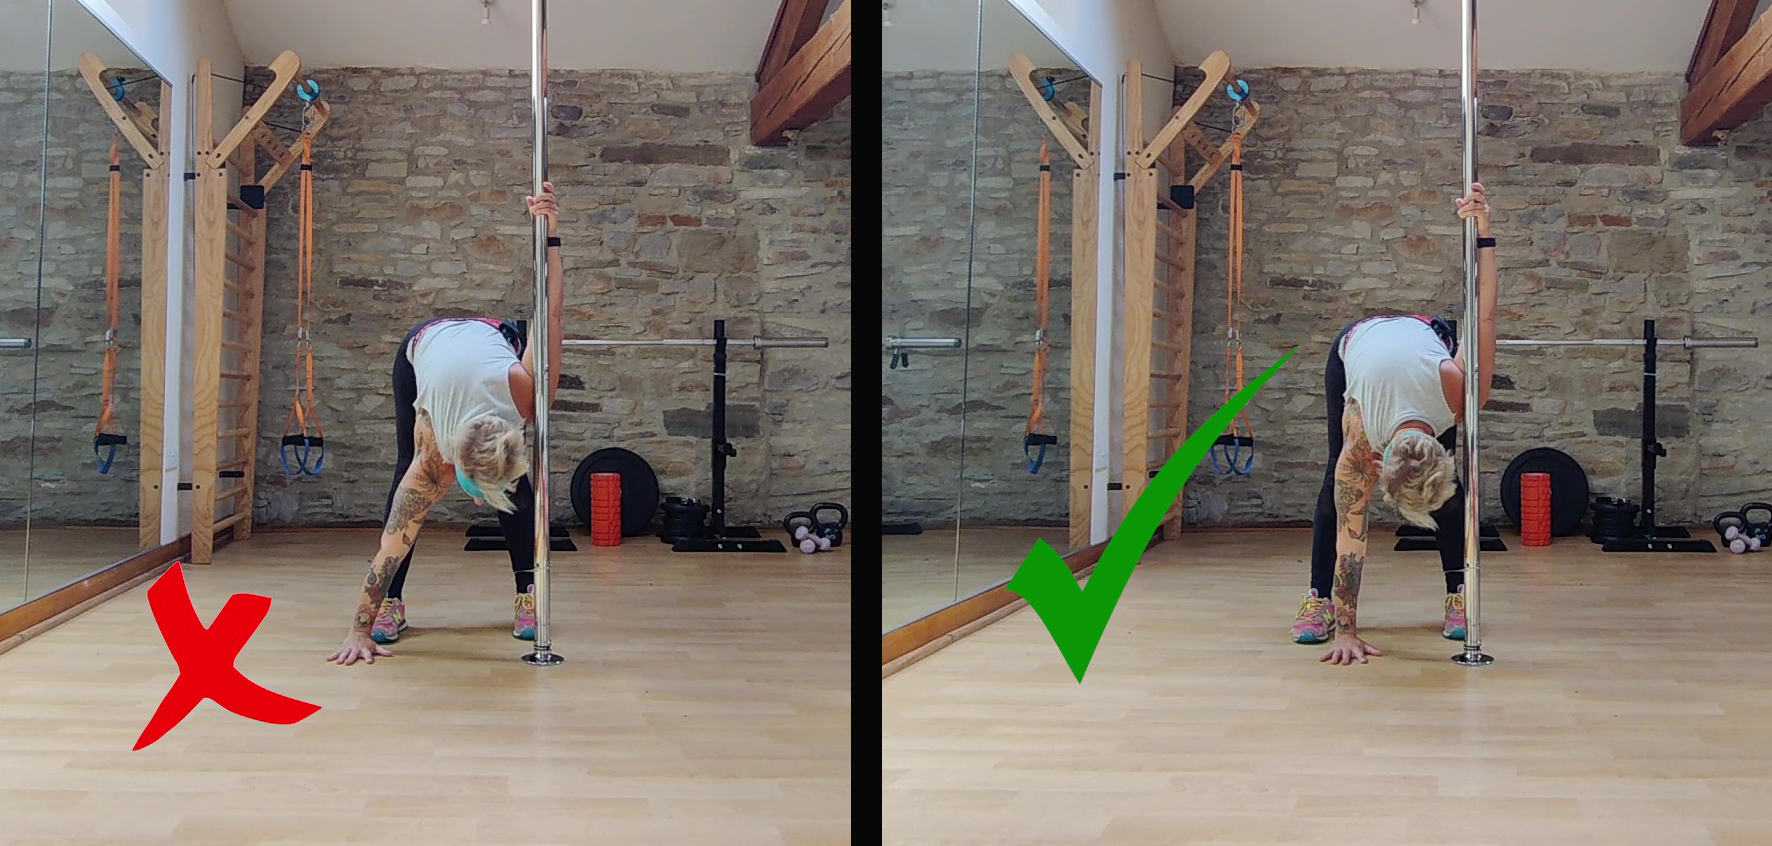
Pole Handstand set up Tip #1
Don’t be tempted to go too wide with that bottom hand! To help create an efficient ‘stack’ for your handstand, try placing that hand roughly in-line with your shoulder.
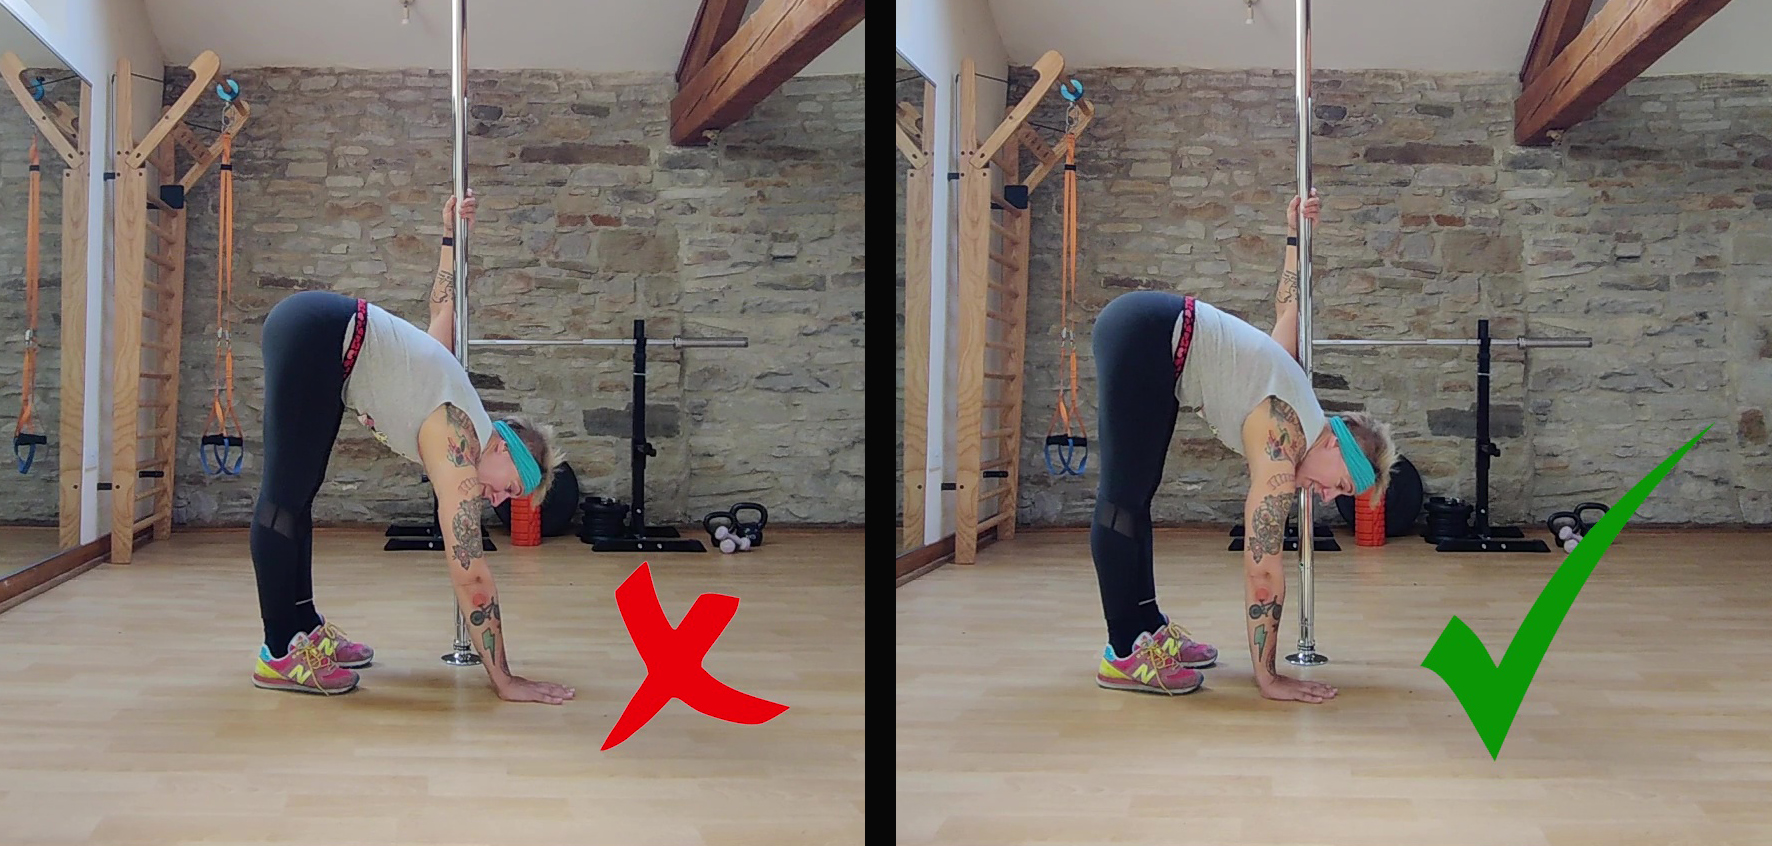
Pole Handstand set up Tip #2
When it comes to aligning the bottom hand with the pole in the sagittal plane, if your bottom hand is too far ahead of the pole, it can create a ‘twist’ in your positioning that will be challenging to balance.
What’s more, if you want to be able to deadlift into your pole handstand one day, you’ll need to be able to get your hips stacked pretty much above your bottom hand in order to get that magical handstand ‘float’ off the floor. The further away that bottom hand is, the more you’re gonna fight to get there!
This is why I usually recommend aiming to line the pole up with your fingertips / middle of your fingers. Experiment and see how it feels!
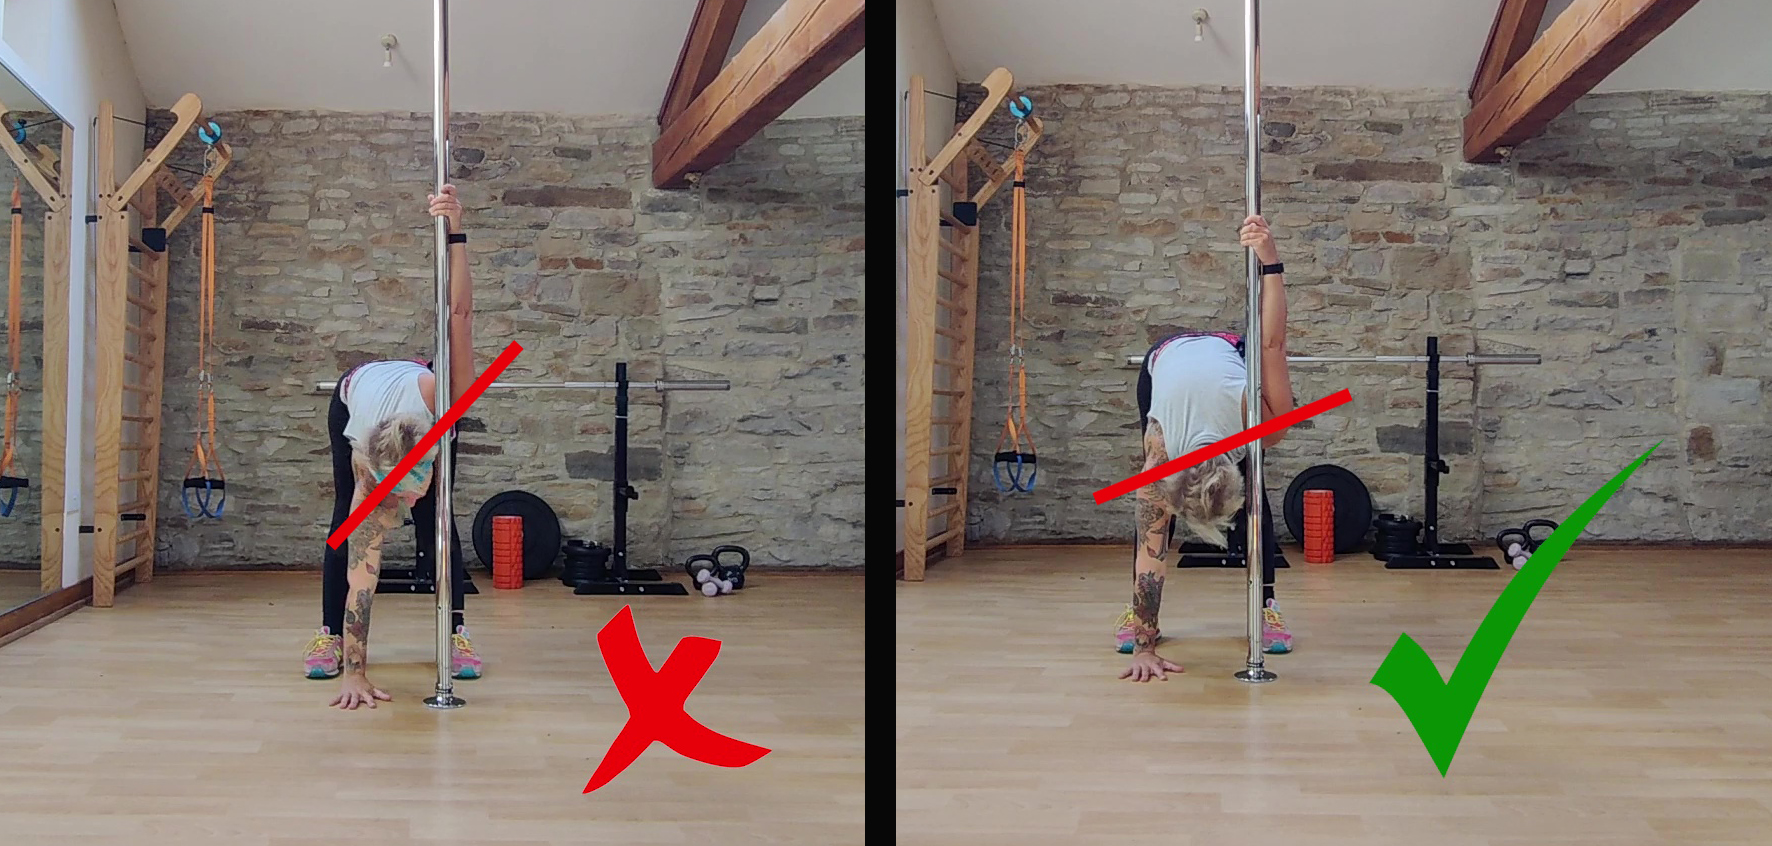
Pole Handstand set up Tip #3
Finally – that top arm position!
If you read my Pole Handstand anatomy post, you’ll know that taking the inside hand too high can create additional imbalance. If the inside shoulder is excessively high, you’ll need to fight a lot of additional force that’s directing your body out to the side and you’ll probably need to create more of a side bend to get your feet stacked back over your shoulders.
If instead you go too low with that inside hand, you may struggle to press into the bottom arm. We need to allow enough space so that the bottom scapula can upwardly rotate – this is going to help create a strong and efficient position for our bottom shoulder to be in when it’s 180 degrees overhead.
Pssst… you can find out more about this overhead position in my post here.
To achieve this ‘not too high, not too low’ Goldilocks hand placement, I recommend placing both hands down flat on the floor first. Then actively shrugging into that position to get that upward rotation before taking your inside hand up to the pole – this usually creates a pretty solid starting point to work from.
Just in case you’d like a quick video recap of these tips…
Happy handstanding!
Did you find these tips useful? Are there any additional handstand set up cues that have helped you or your students nail this move? I’d love to know! You can find me on Facebook or Instagram!
If you’re already nailing the pole handstand and are ready to start working on the magnificent handstand deadlift – did we just become best friends?! Skip hand-in-hand with me to my next post, where I’m sharing some of my favourite pole handstand deadlift progressions!
Join my mailing list for free training advice direct to your inbox!
…including my FREE EBOOK “Grip Gainz – Grip Training for Pole Athletes” – with training drills and programming to help you achieve a vice-like pole grip.
I hate spam, too! When you join my mailing list, I’ll also notify you about new blogs and Pole PT updates that I think you might be interested in, but I’ll keep it to a minimum! You can unsubscribe at any time!