In my last blog, we used the ball to add an extra CHALLENGE to *progress* bodyweight exercises. Now we’re using the ball to *ASSIST* with and *REGRESS* pole movements instead. Yey, progressions = my favourite!
Using a stability ball as a support is AWESOME, because it means we can train in the position of a movement or pole trick without fully loading it. This is perfect for:
- Learning the proper mechanics of a pole move before doing it fully loaded.
- Conditioning to build strength for a move.
- Slowly getting used to the pain of a new grip (superman, I’m looking at you, bro).
- Building confidence in a move that freaks us out when we do it up the pole *cough, layback, cough*.
- Deloading the movement so you can train a higher volume of it without overtraining.
- Muscle balancing on ‘that side we shall not speak of’.
*To clarify that last point… We all know we *should* train both sides, but in reality, if you skipped the whole ‘train both sides’ thing when you started, or if you just never managed to ‘land’ a trick on the other side, it is normal that you may only be able to perform certain movements on one side.
Using the ball to train the ‘other’ side is a good way of starting to even-out that imbalance and train the same muscles you are using on the ‘better behaved’ side, without needing to be able to execute the full movement.
+ If you are running a routine, this is a great tool you can use to start to address the repetition of performing a movement on one side, without adding too much additional load and stress to your body. Magic.
Here are some examples of this in practice…
Pole move 1: Chopper / invert
- Think about keeping the chest lifted, so you are not rounding the shoulders forwards. Set this shoulder position at the start and try to maintain it throughout the movement. In the chopper position, check in again and make sure you still have your chest lifted and aren’t letting your shoulders round forwards. To train isometric strength in the end position, you can hold the chopper position for a set number of seconds – you can practice taking more weight into your arms by pulling and lifting your hips slightly off the ball.
- Tuck the knees first, then tip back as you straighten your arms – it is this co-ordination of the tuck and tip backwards that many people struggle with when first learning this move. This is a great way to practice it safely without even leaving the floor.
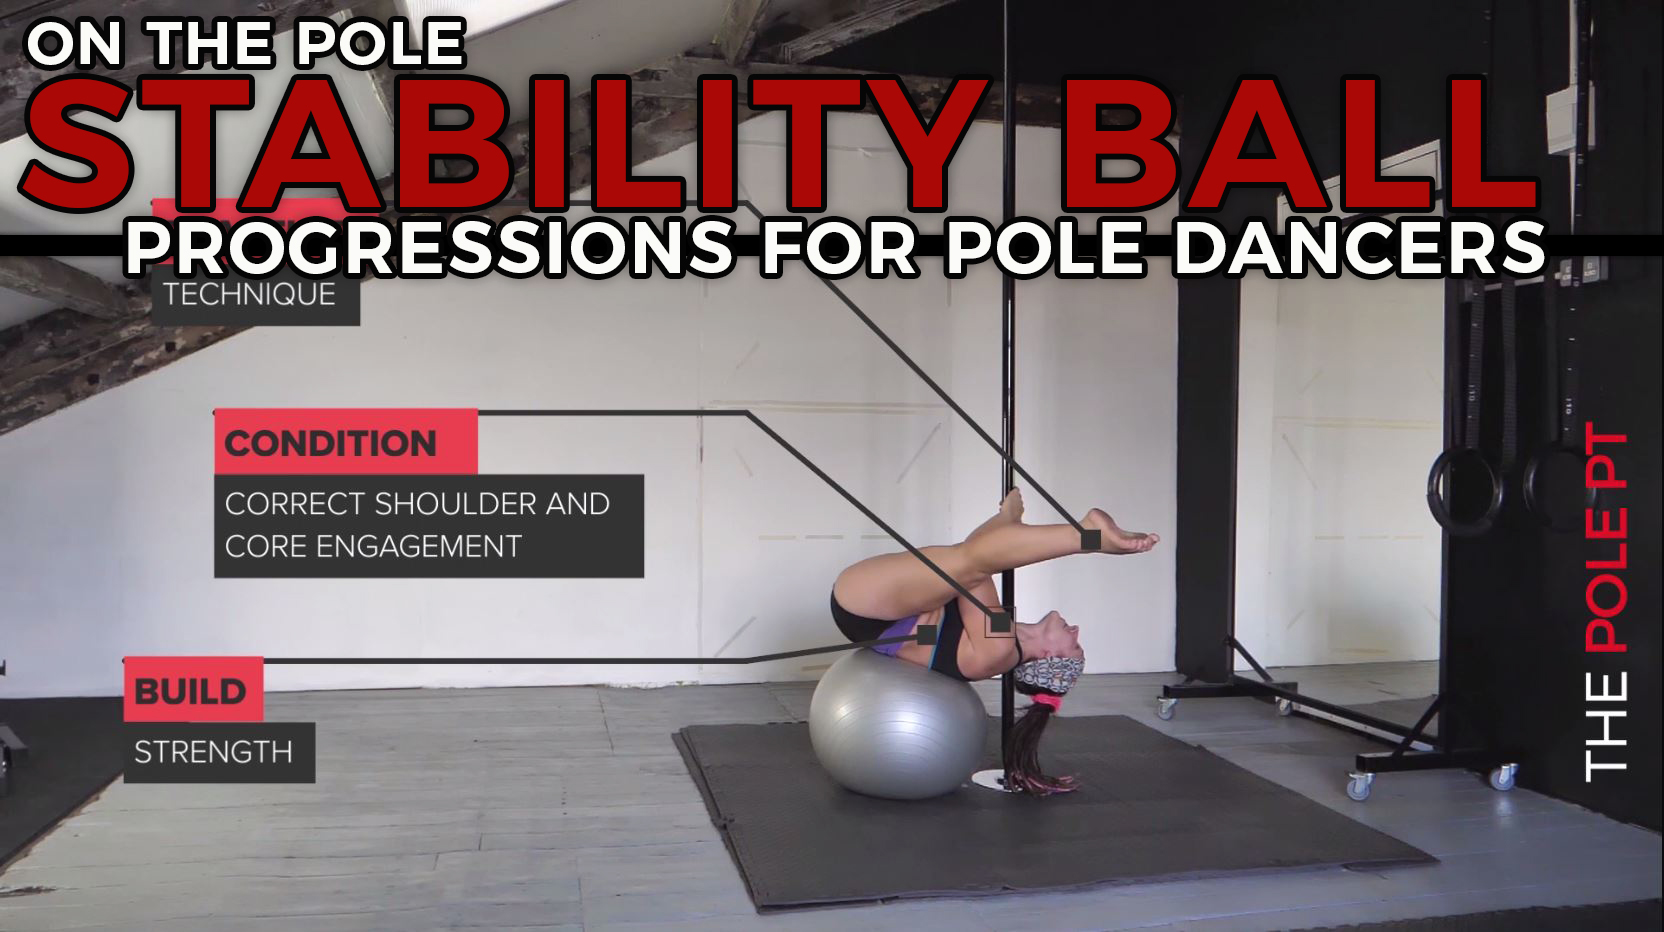
Pole move 2: Lay back
Using the stability ball for a lay back is a good example of how we can use the ball to support some of our weight while we build confidence in a move. For many, a lay back (especially a straight legged one) summons up a certain amount of trepidation. Performing the movement on a Swiss ball means you can start to condition the leg grip while also getting used to the feeling of laying back, minus the obvious danger of being in the air!
This is also a great option for learning lay backs if you don’t have a spotter.
Cues: stability ball lay back
- Come into a pole sit a little higher than the ball, cross the ankles and squeeze the legs together.
- Your legs should be tightly engaged – squeeze your quads and create some internal rotation (imagine you are rotating your knees towards each other) – this will help you to ‘lock’ the grip between your legs.
- If you have grip on the pole, you can release the hands from the pole and slowly lower back onto the ball, maintaining that leg engagement the whole time.
Pole move 3: Superman
- Not the most graceful of entry points, but you want to place the ball against the pole and lower into a plank position with your torso on the ball and crotch close to the pole. From here, take one hand onto the pole. Then lift one leg so your foot ends up around level in height with your hips – squeeze it against the pole!
- Bring the other leg up to join it so you can squeeze the pole between your legs and then push your feet towards the ceiling. If it feels okay, you can release the hand from the floor. Voila: superman!
Pole move 4: Shoulder mount
- Come into your shoulder mount position with your weight supported by the ball – think about starting with your body already pretty much horizontal to the floor – it is the final tuck and straddle position we are working here.
- Use a cup grip and make sure the squidgy part of your shoulder is on the pole, not the bone! Tuck knees to chest, then pull and come into your straddle. You can hold the end position for a set amount of time and/or play around with lifting your hips off the ball, so you are taking more of the weight into your upper body.
- Think about keeping the chest lifted – try not to bring the elbows together but keep them wide and squeeze the shoulder blades together to avoid rounding the upper back.
Pole move 5: Iron X
Cues: stability ball Iron X
- It can be a bit tricky to get the right positioning for this one, but you want the ball to end up around hip level, so it is supporting your weight.
- Take one hand high and one low – you can do this in any bracket grip (I am using twisted grip in my demo). Keep the bottom foot on the floor until you find your balance, but engage the quads and take the legs wide if you can.
- Push through the bottom arm – imagining that push coming from the shoulder, not just the arm, and pull with the top arm, imagining you are pulling your top hip towards your top hand.
- *If you are new to twisted grip or are unsure about whether your shoulders are ready for it, please check out my blog series: Twisted Grip, is it really so bad?*
Stability balls, used creatively, really can add a whole new dimension to your pole workouts. I LOVE them for progressions as well as for adding stability challenges to off the pole exercises. Have fun and keep me posted if you try any of these!
If you enjoyed these stability ball progressions, you’ll LOVE my progressive online strength programmes for pole dancers, including ‘Pole Proof Shoulders’, ‘No Kick Invert’, ‘Shoulder Mount’ and ‘Strength and Stretch for Splits’ – all 6-weeks long and ready for you to download and start today!
And if you REALLY wanna nerd out on the sports science of training for pole – check out my book Strength and Conditioning for Pole – over 450 pages of pure pole geeking awaits!
Join my mailing list for free training advice direct to your inbox!
…including my FREE EBOOK “Grip Gainz – Grip Training for Pole Athletes” – with training drills and programming to help you achieve a vice-like pole grip.
I hate spam, too! When you join my mailing list, I’ll also notify you about new blogs and Pole PT updates that I think you might be interested in, but I’ll keep it to a minimum! You can unsubscribe at any time!